Role: UX designer
The team also included a Content Strategist, Project Manager, three Engineers and I worked closely with the designer on the Onboarding team.
Project:
Integrated stencil design for Onboarding/Property editor, and Coaching patterns for new and important features
Skills:
• UX design (user testing, data driven design, structural design, navigation redesign, MVP & north star)
• UI design (content hierarchy, structural, visual patterns, consistency across partner platform)
Stencil design - Property Editor
Problem Statement:
Property owners need a more consistent UI to make it an easier transition from Onboarding to the Property Editor where they need to update their listings so that travelers can see their amenities and other important information.
Stencil design purpose:
• To help property owners add more information to their listing to make it more attractive to travelers
• To create an easier UI transition from Onboarding to PE
• To help their listing show up in more search results by adding data
Task:
The goal was to create an underlying component structure that would be able to apply to Onboarding and the Property Editor. My first step was to pull apart the current Property editor experience and re-arrange things for an easier to understand layout for the user.
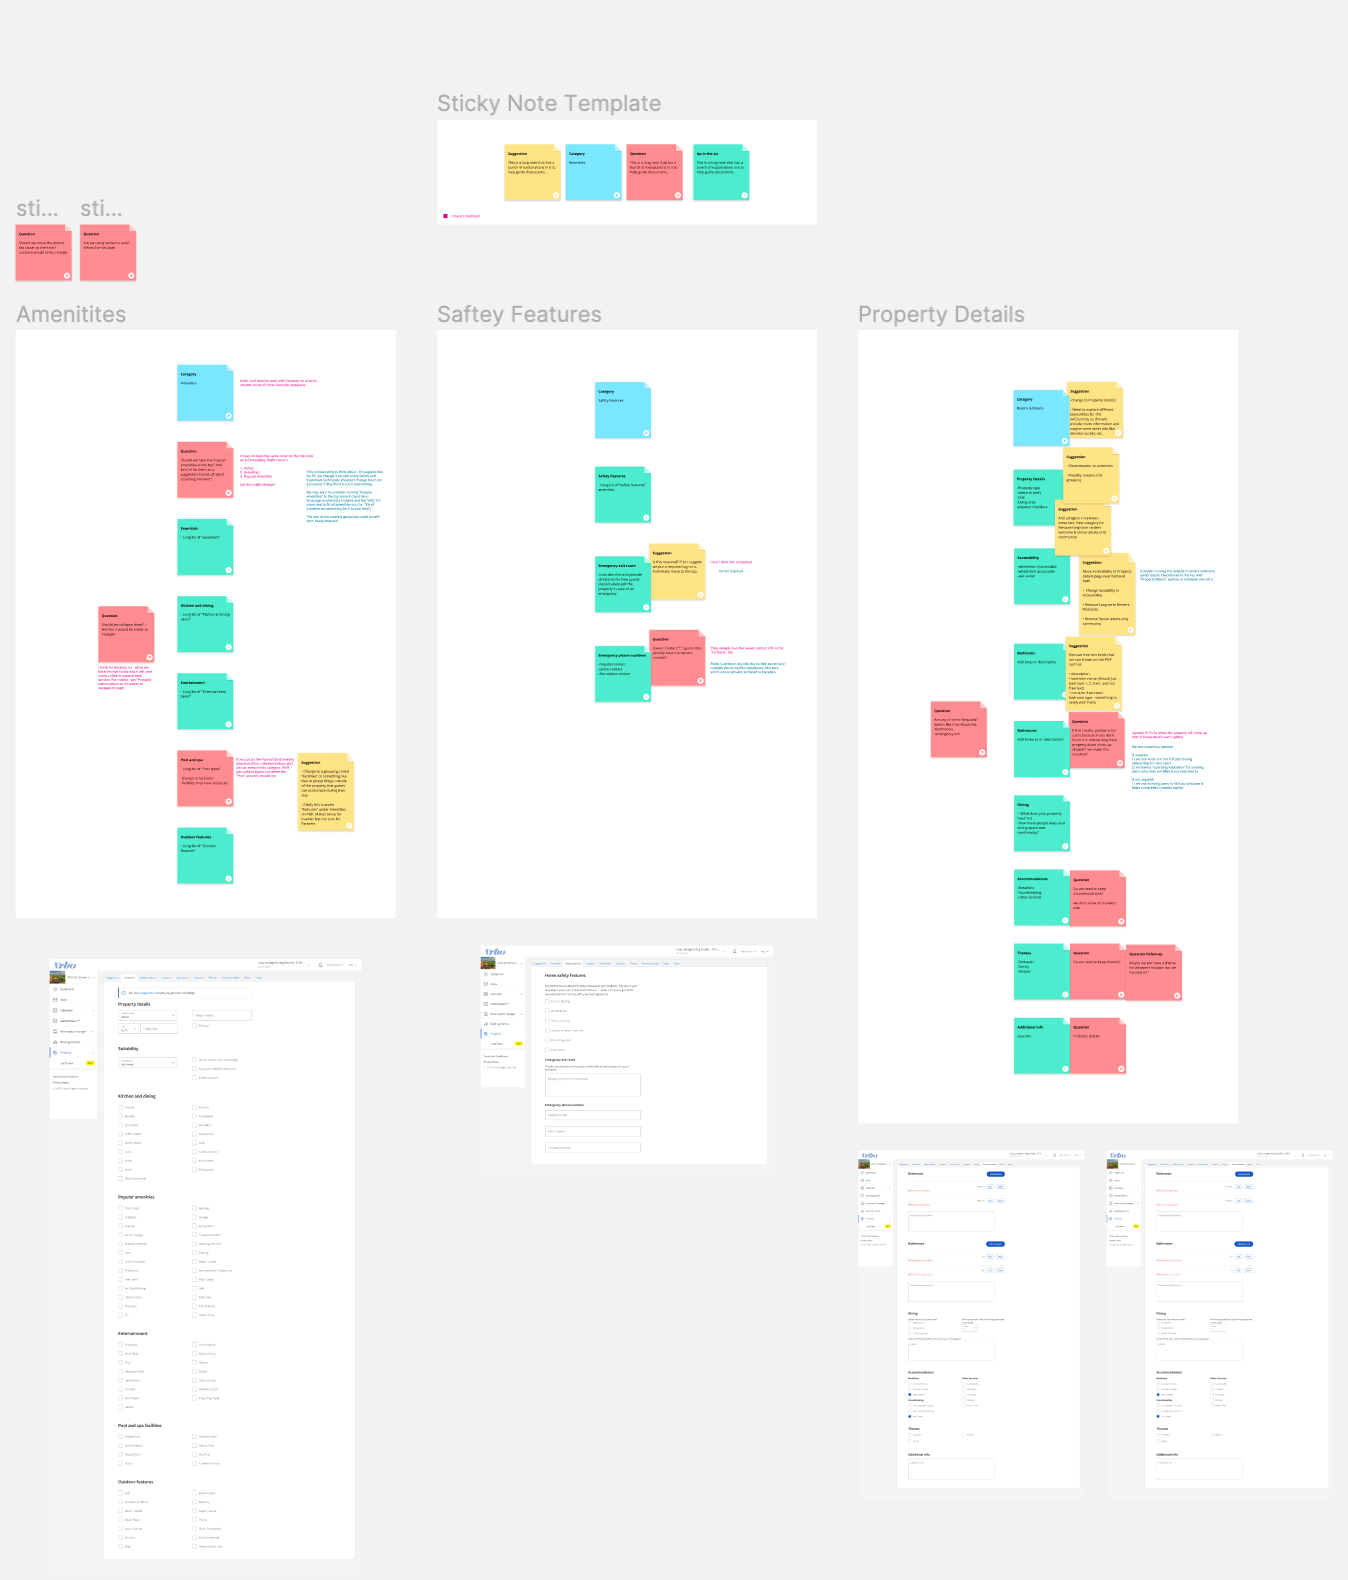
Figma sticky note boards with reference screens
After finalizing the structure of the pages, I started to design them.
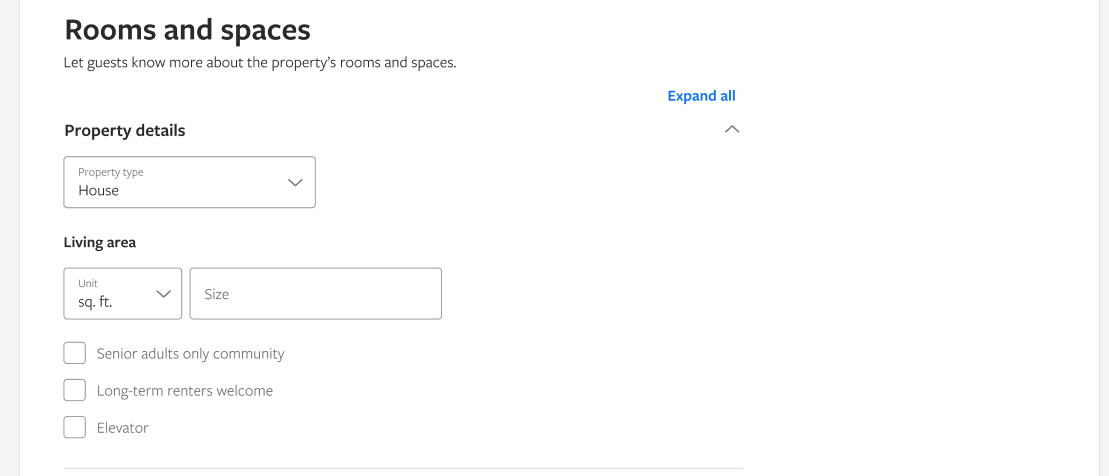
Amenities & Rooms and Spaces tab on Property Editor
The amenities page is one of the most important pages in the property editor experience. It houses all of the amenities that a property will have available when the traveler shows up. Travelers tend to filter by amenities and bedroom/bathroom details. So if a Partner does not fill out the correct amenities they could miss a booking.
Amenities Before & After
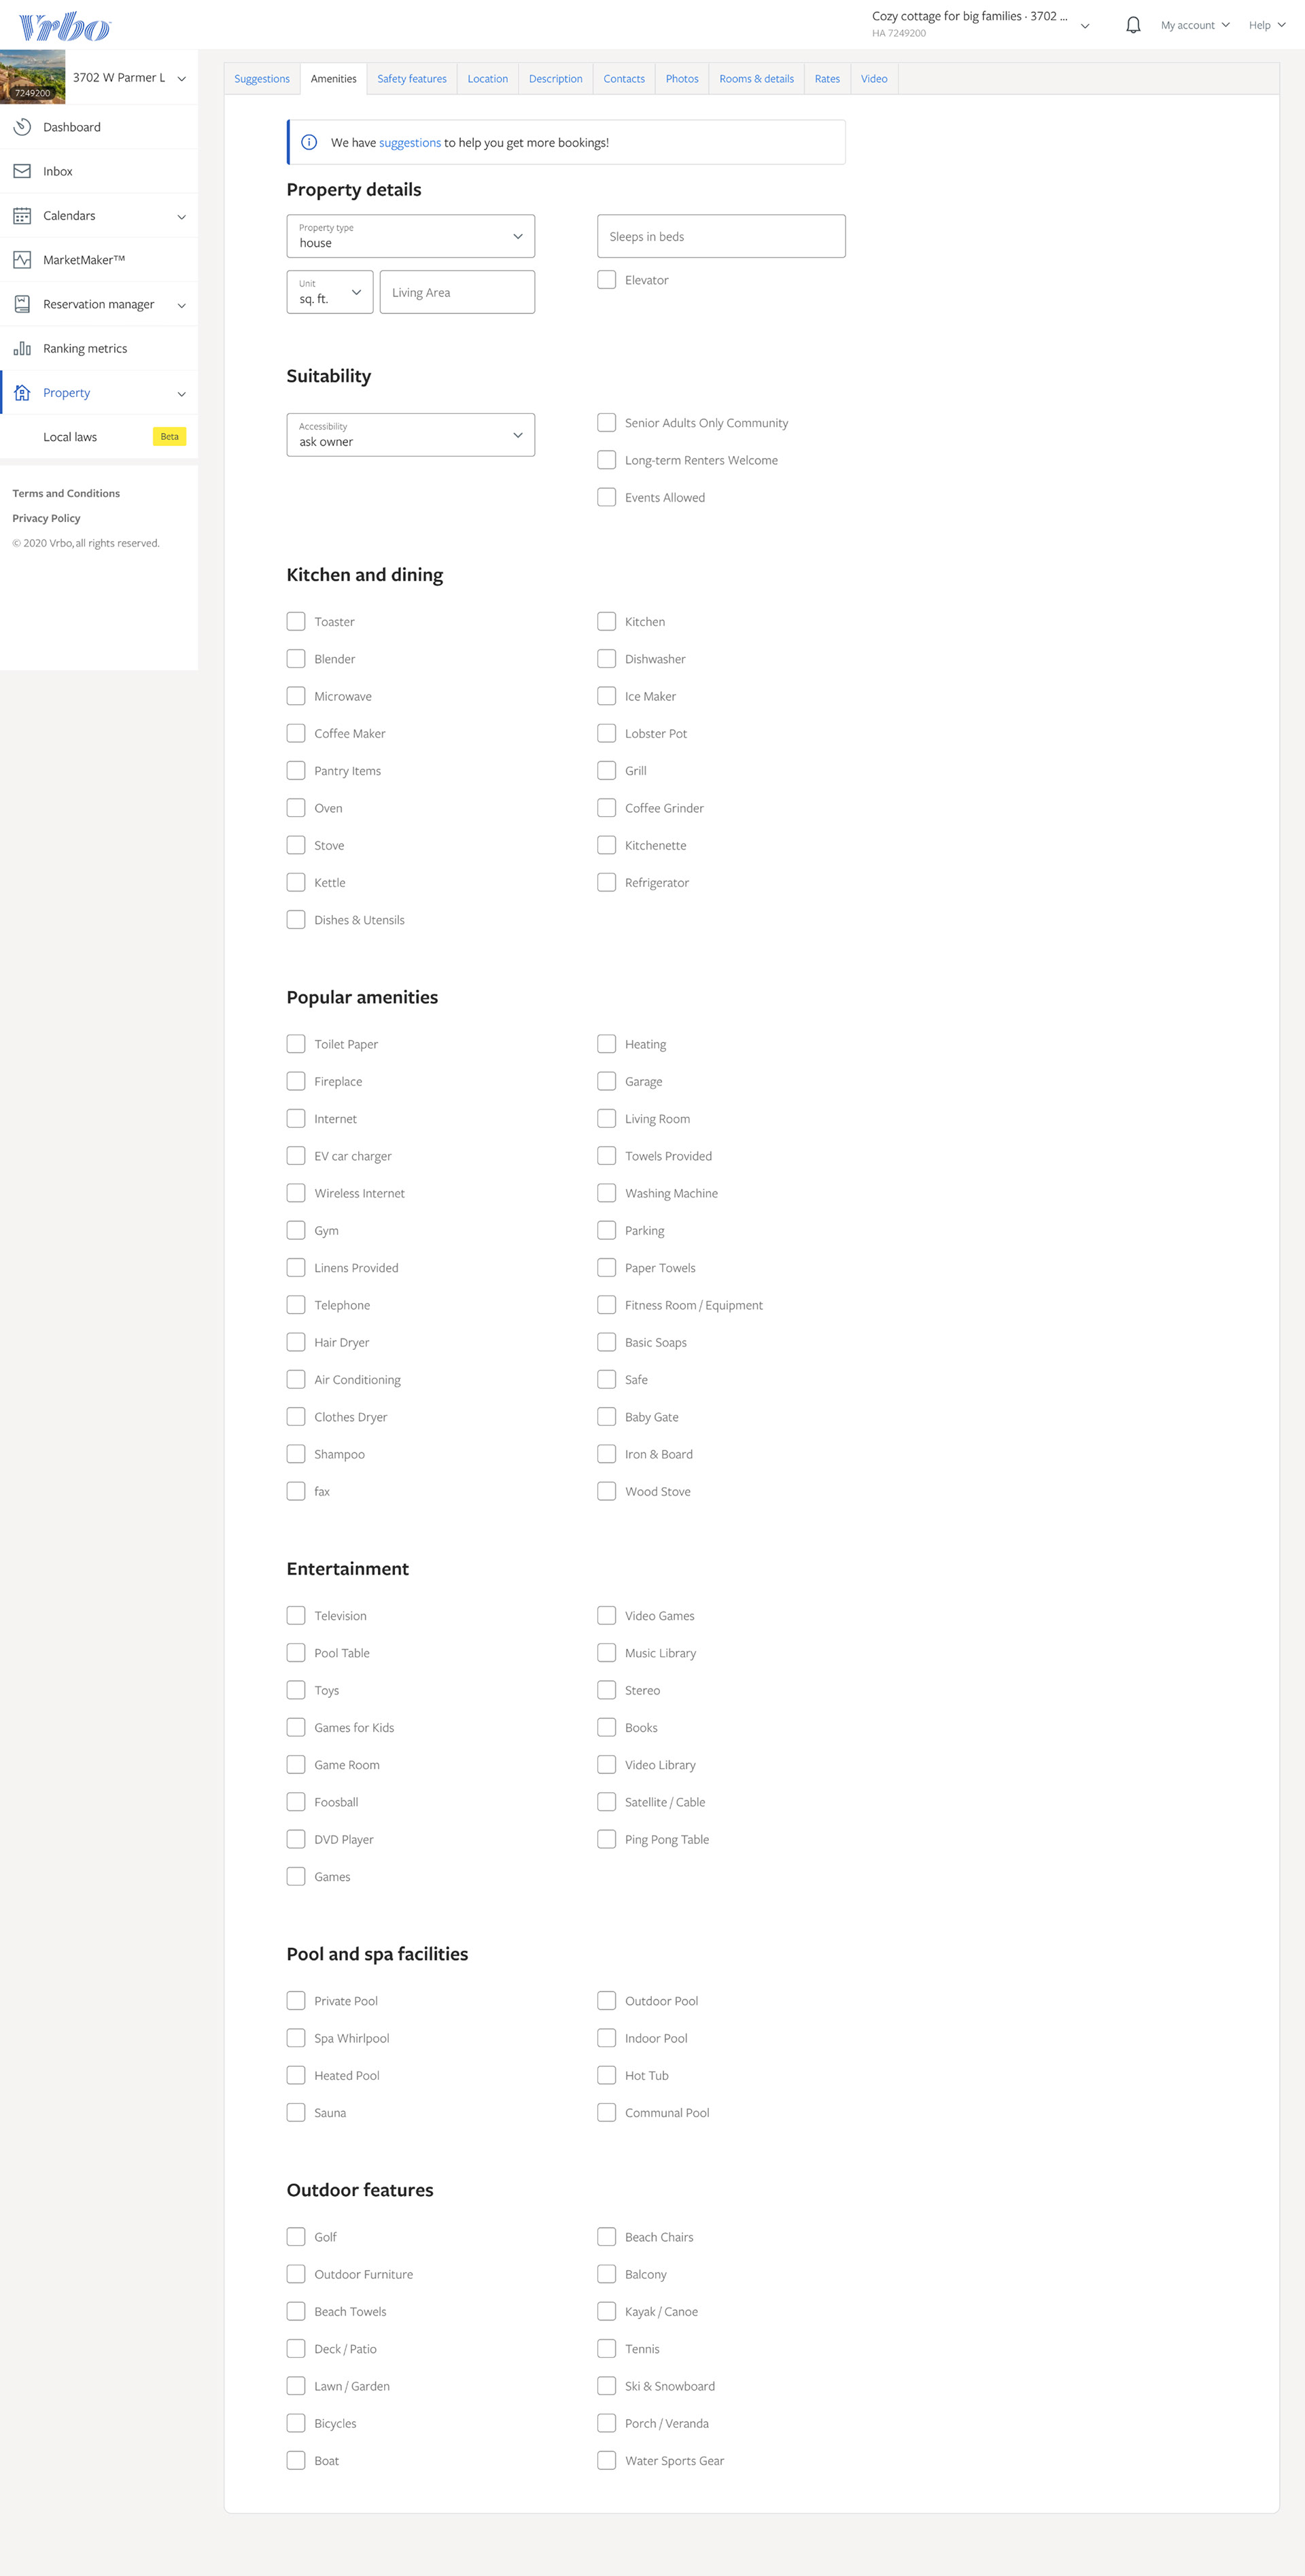
Amenities tab before
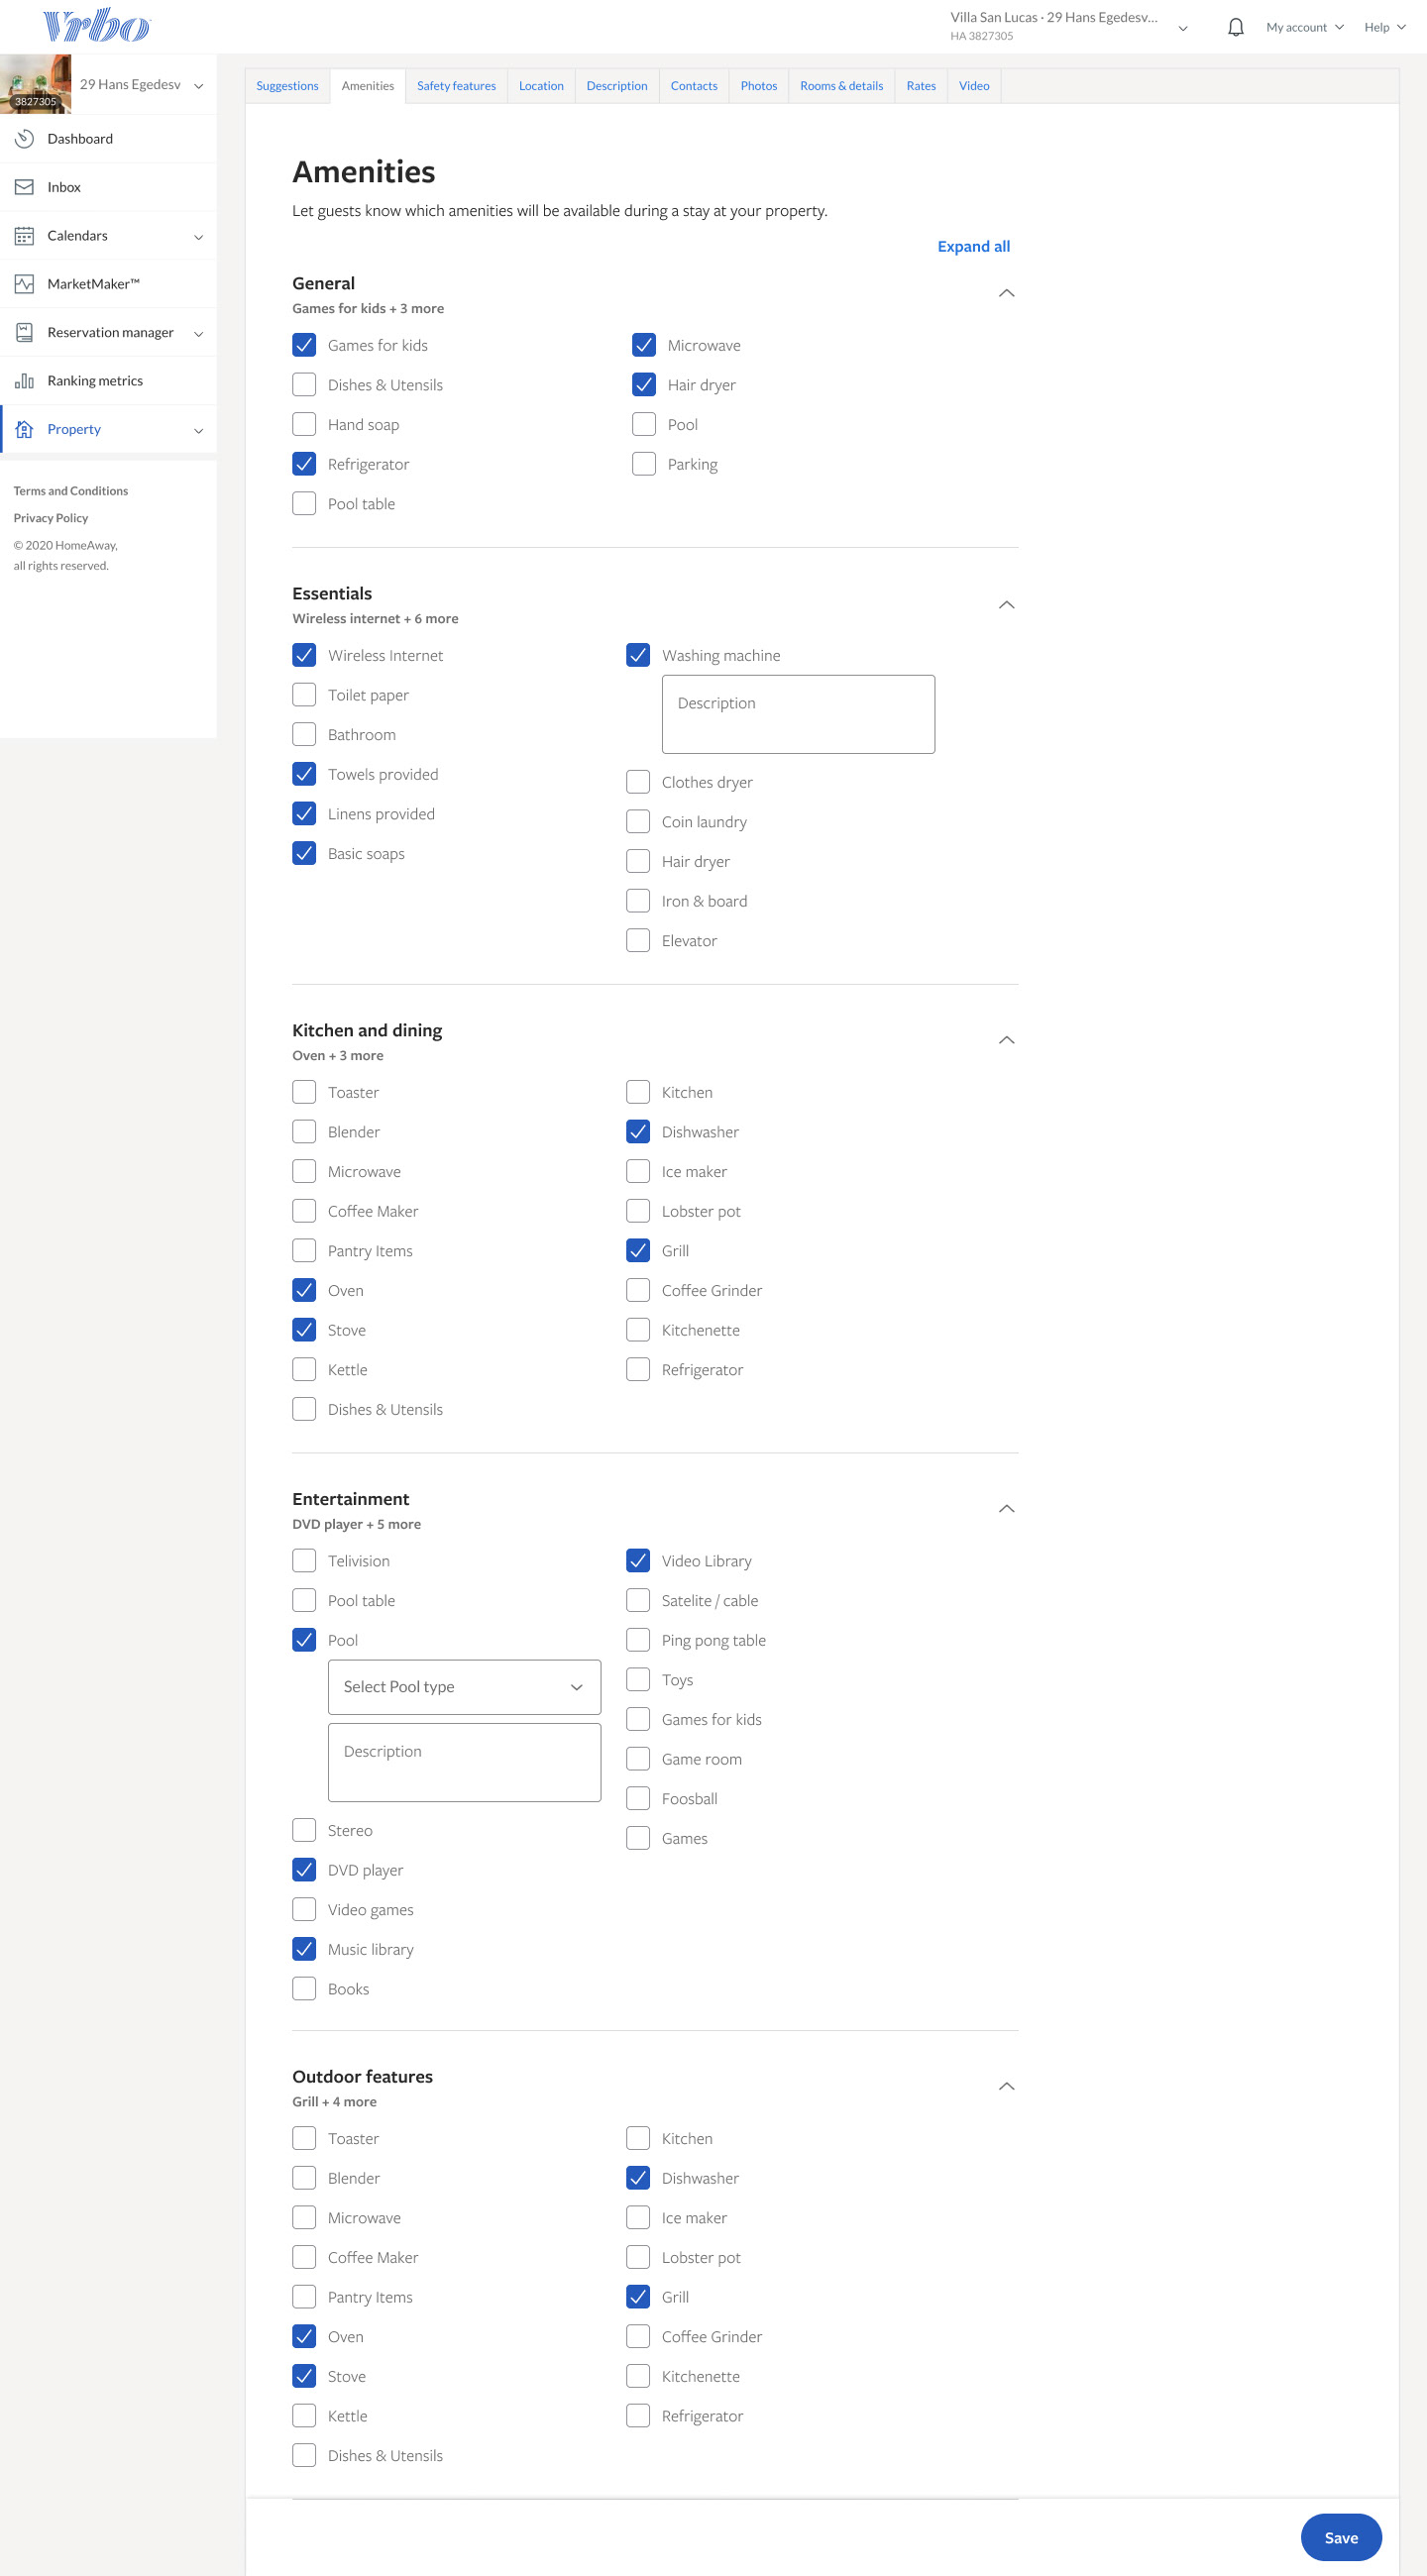
Amenities tab after
Overall updates to Amenities:
• Added collapsable sections to shorten the length of the page
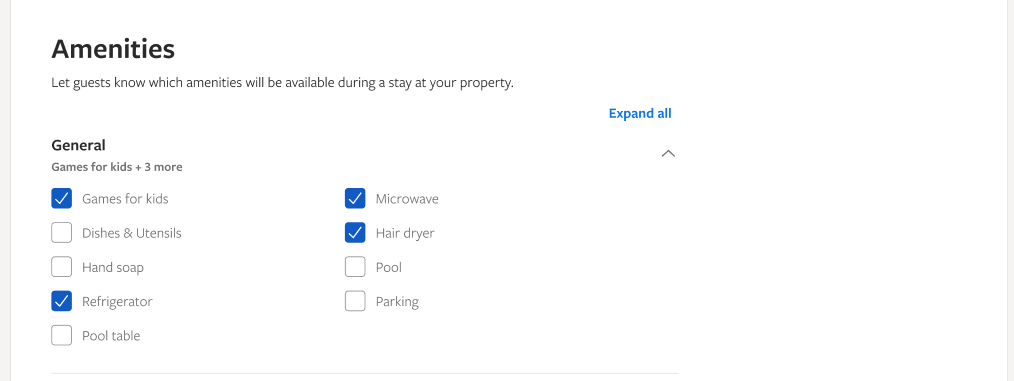
• Moved Property details to the "Rooms and spaces" tab
• Combined "Suitability" with the Property details category and deleted the drop down (unnecessary)
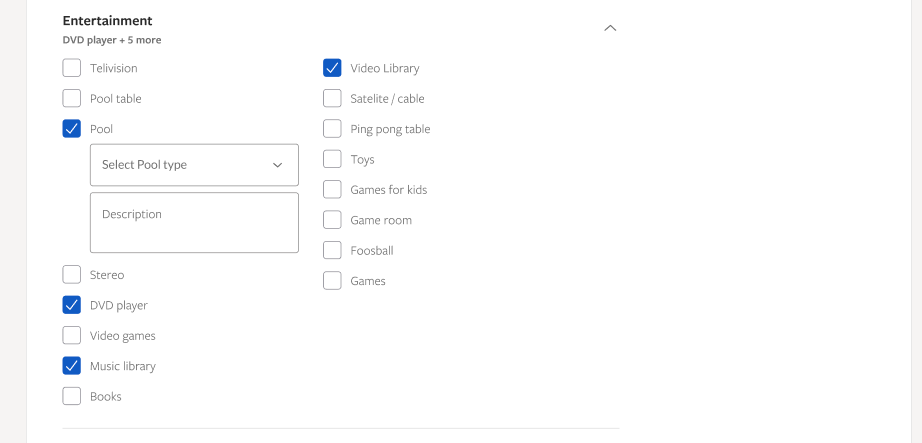
• Created a drop down for all the pool types (Ex: outdoor, indoor, heated)
Onboarding
The layout of Onboarding is different and has less options to choose from. Keeping it as similar to the Property Editor as we could was the goal. We used the same components, padding, typography size, and categories.
• The top section is where we surface the top ten "popular amenities" depending on the location of the owner
• We recently added safety amenities and essentials so we have these listed to fill out as well
• We made the decision to allow users to view all amenities if they want to add some they think are important for their property. We hide this in a link because it is not necessary and they can fill it out later in the Property Editor

Onboarding amenities desktop
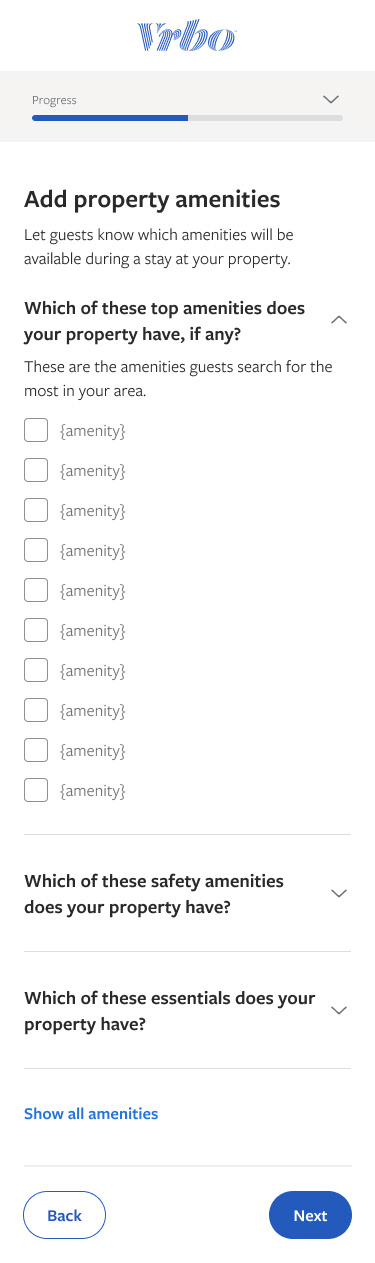
Onboarding amenities mobile
The Property Editor Amenities will populate all pre selected items and show only the general section for default view. We will use coaching plays from the Opportunity page to direct owners to update certain categories.
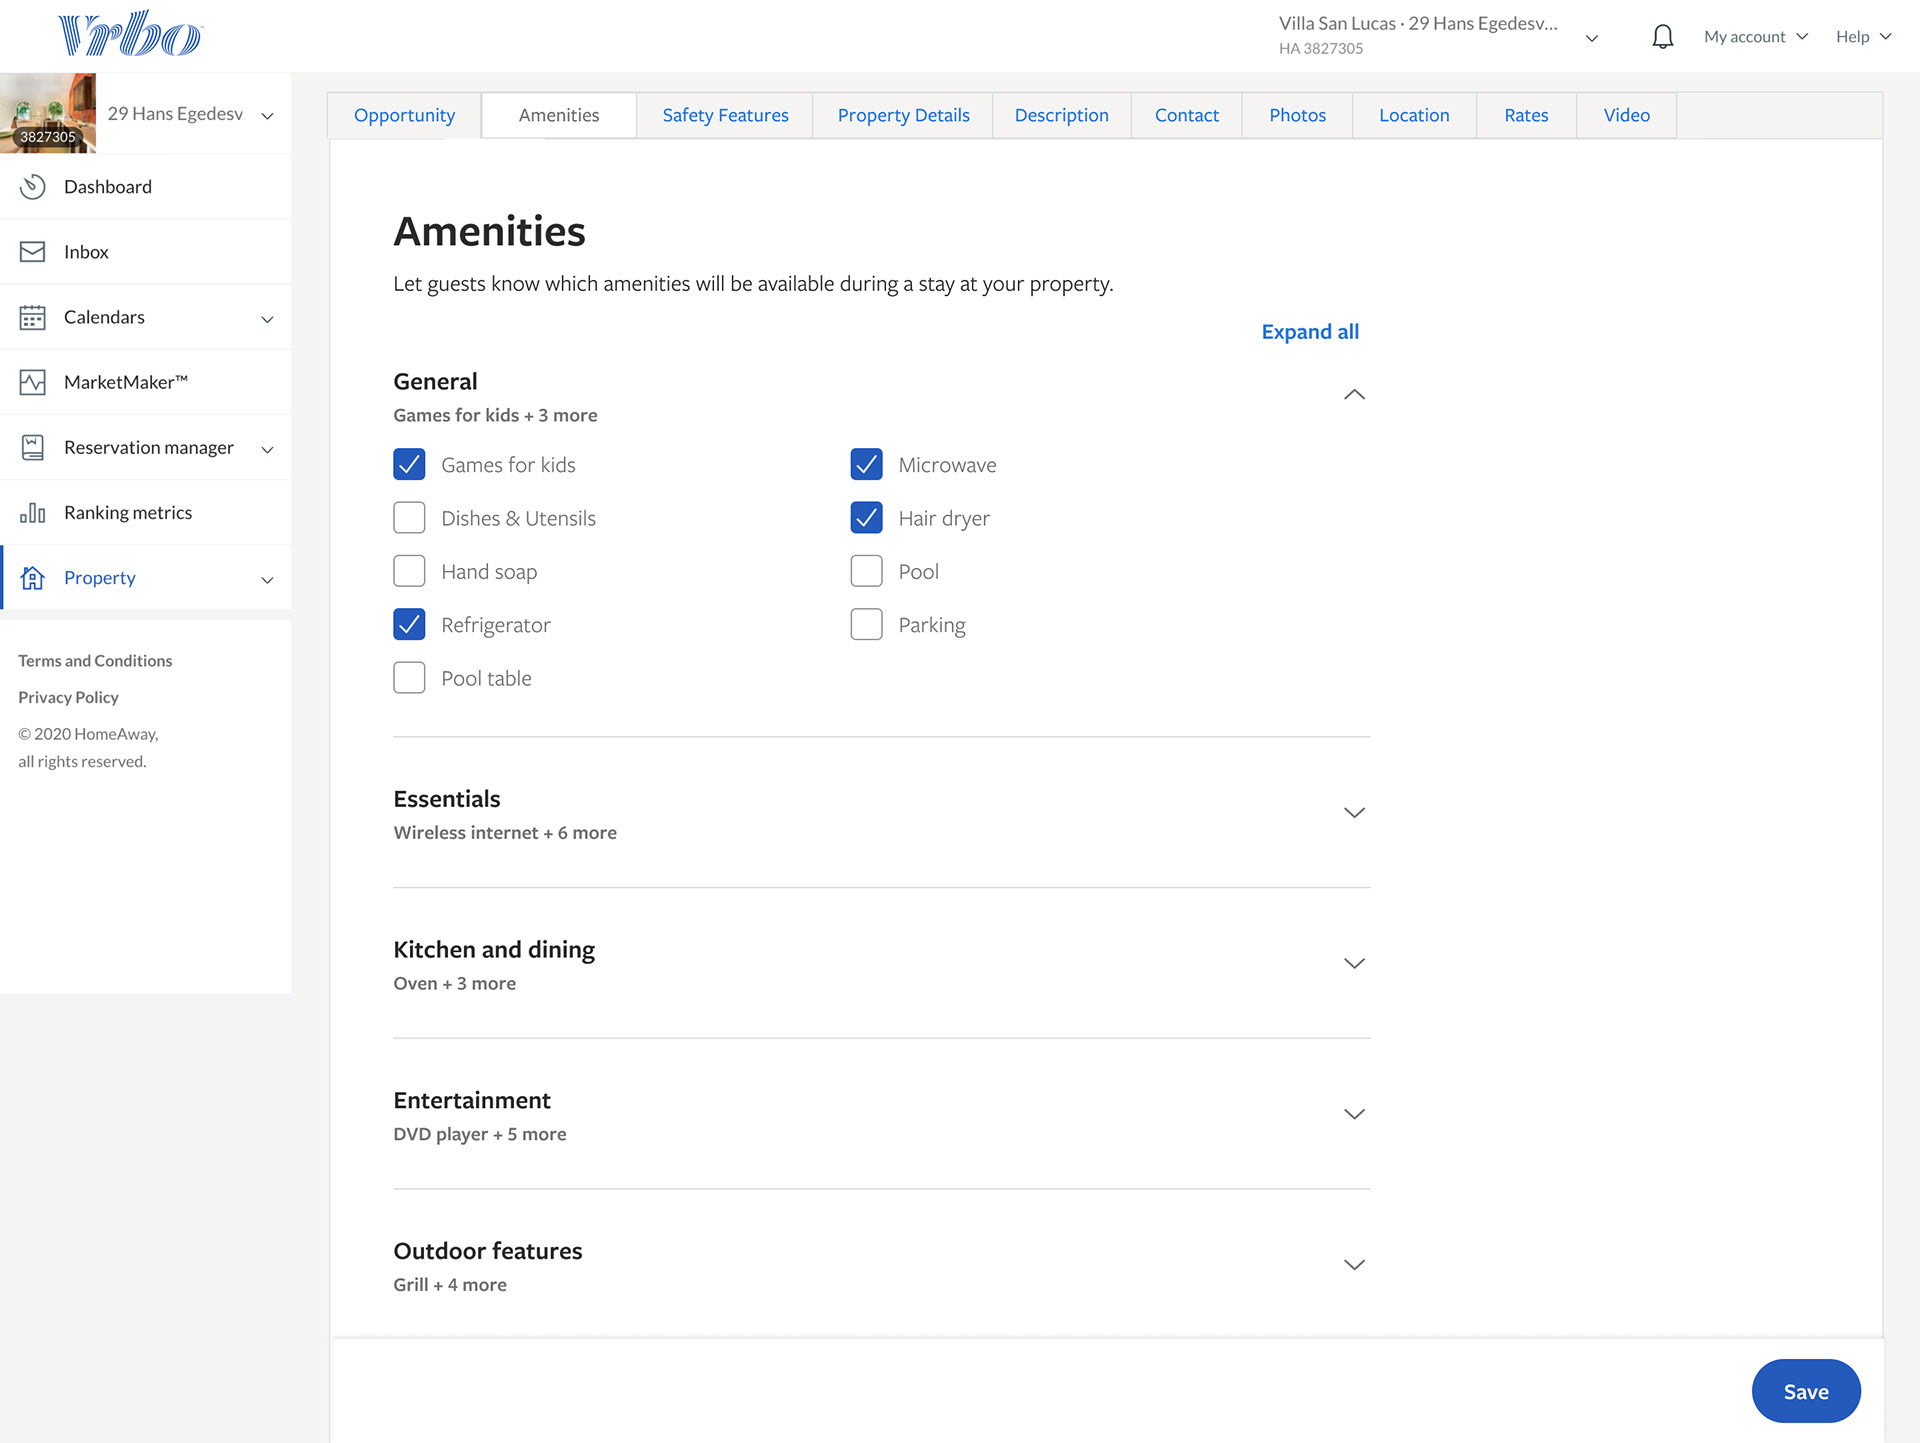
Amenities default page desktop
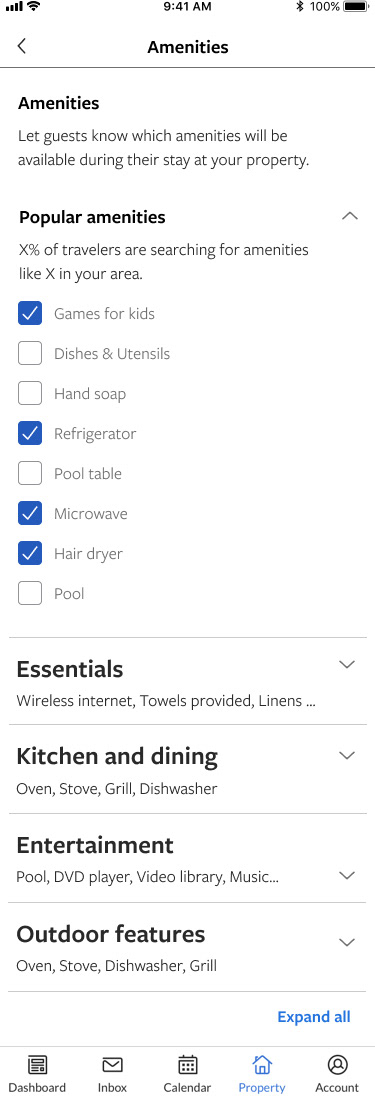
Amenities default page mobile
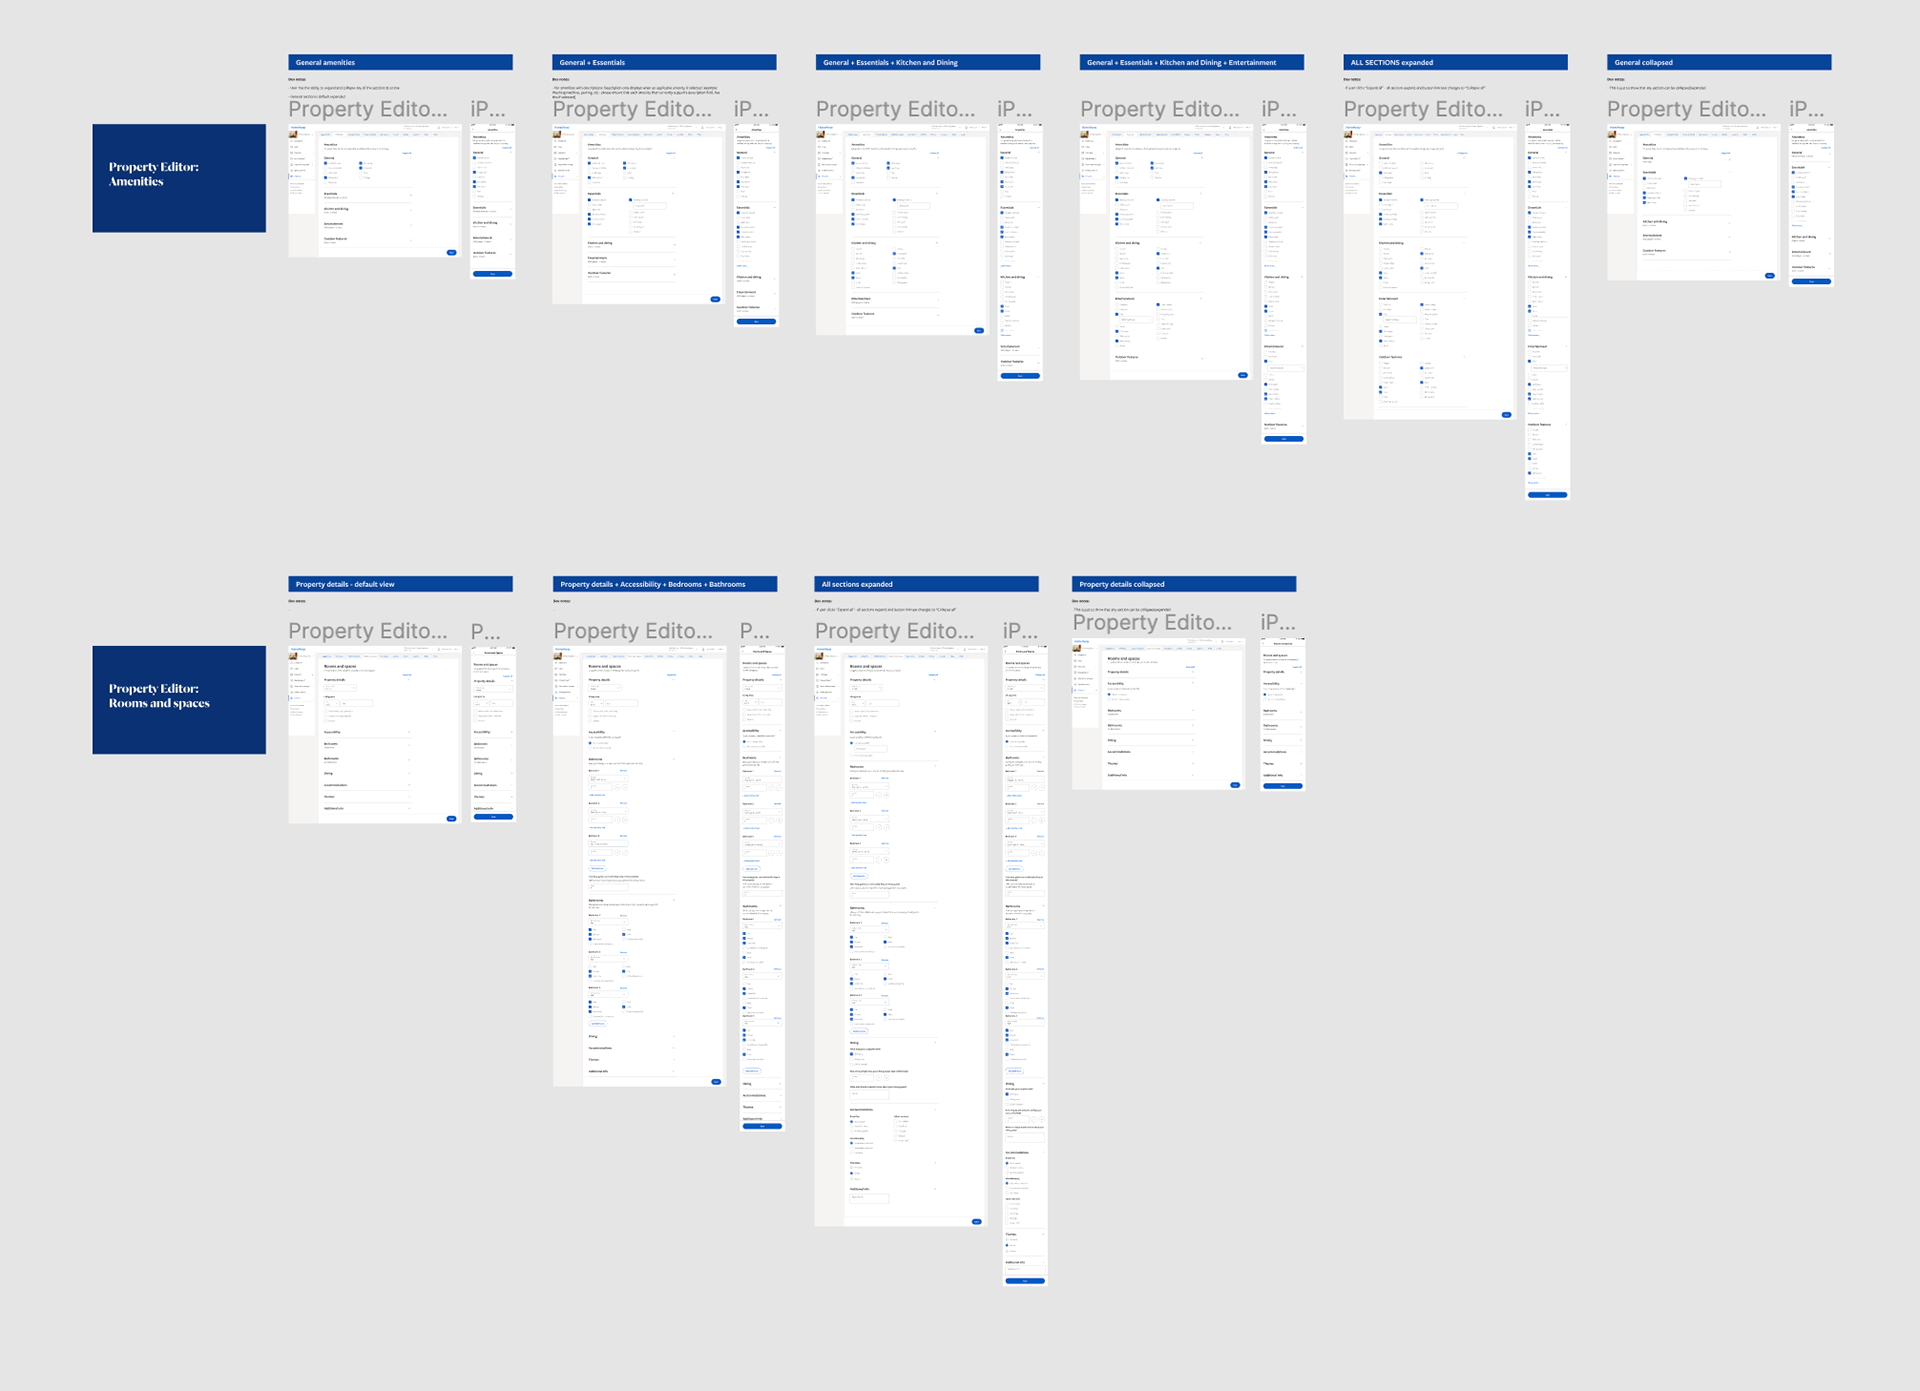
Developer handoff
We do a pretty simple handoff for developers by putting each mobile screen next to the desktop view. I went through this several times to make sure all spacing was pixel perfect and everything was consistent so that they could easily hover over items to see size/margins/padding. I broke each page out for progressive disclosure on the sections so that they will know what each one looks like closed and open. Because Rooms and Spaces is a part of the stencil I put it below the Amenities tab. We combined files and have a separate page for Onboarding.
Key learnings:
• Collaborate with the other designers! Working with another designer on the same stencil was challenging. I learned that you need to align on components, padding, font-sizing, and general details before creating all of the pages
• Use auto layout! This is tremendously helpful to set this up after aligning on the design. Even at just the first page of the flow so that when you duplicate it a million times you can easily update all of them with your pre set up components to use auto layout. This will adjust the entire layout of the page if you move just one thing!
• Get feedback frequently! I often felt the design was finished but getting another set of design eyes on what you have been staring at will help you find things you may have overlooked.
• Prioritize your projects! I often found myself overwhelmed with different projects and had to stop and think about the priority of the projects and their deadlines. Just make sure you are all on the same page and have great communication when you meet.
Opportunity Page with Coaching plays
Problem Statement:
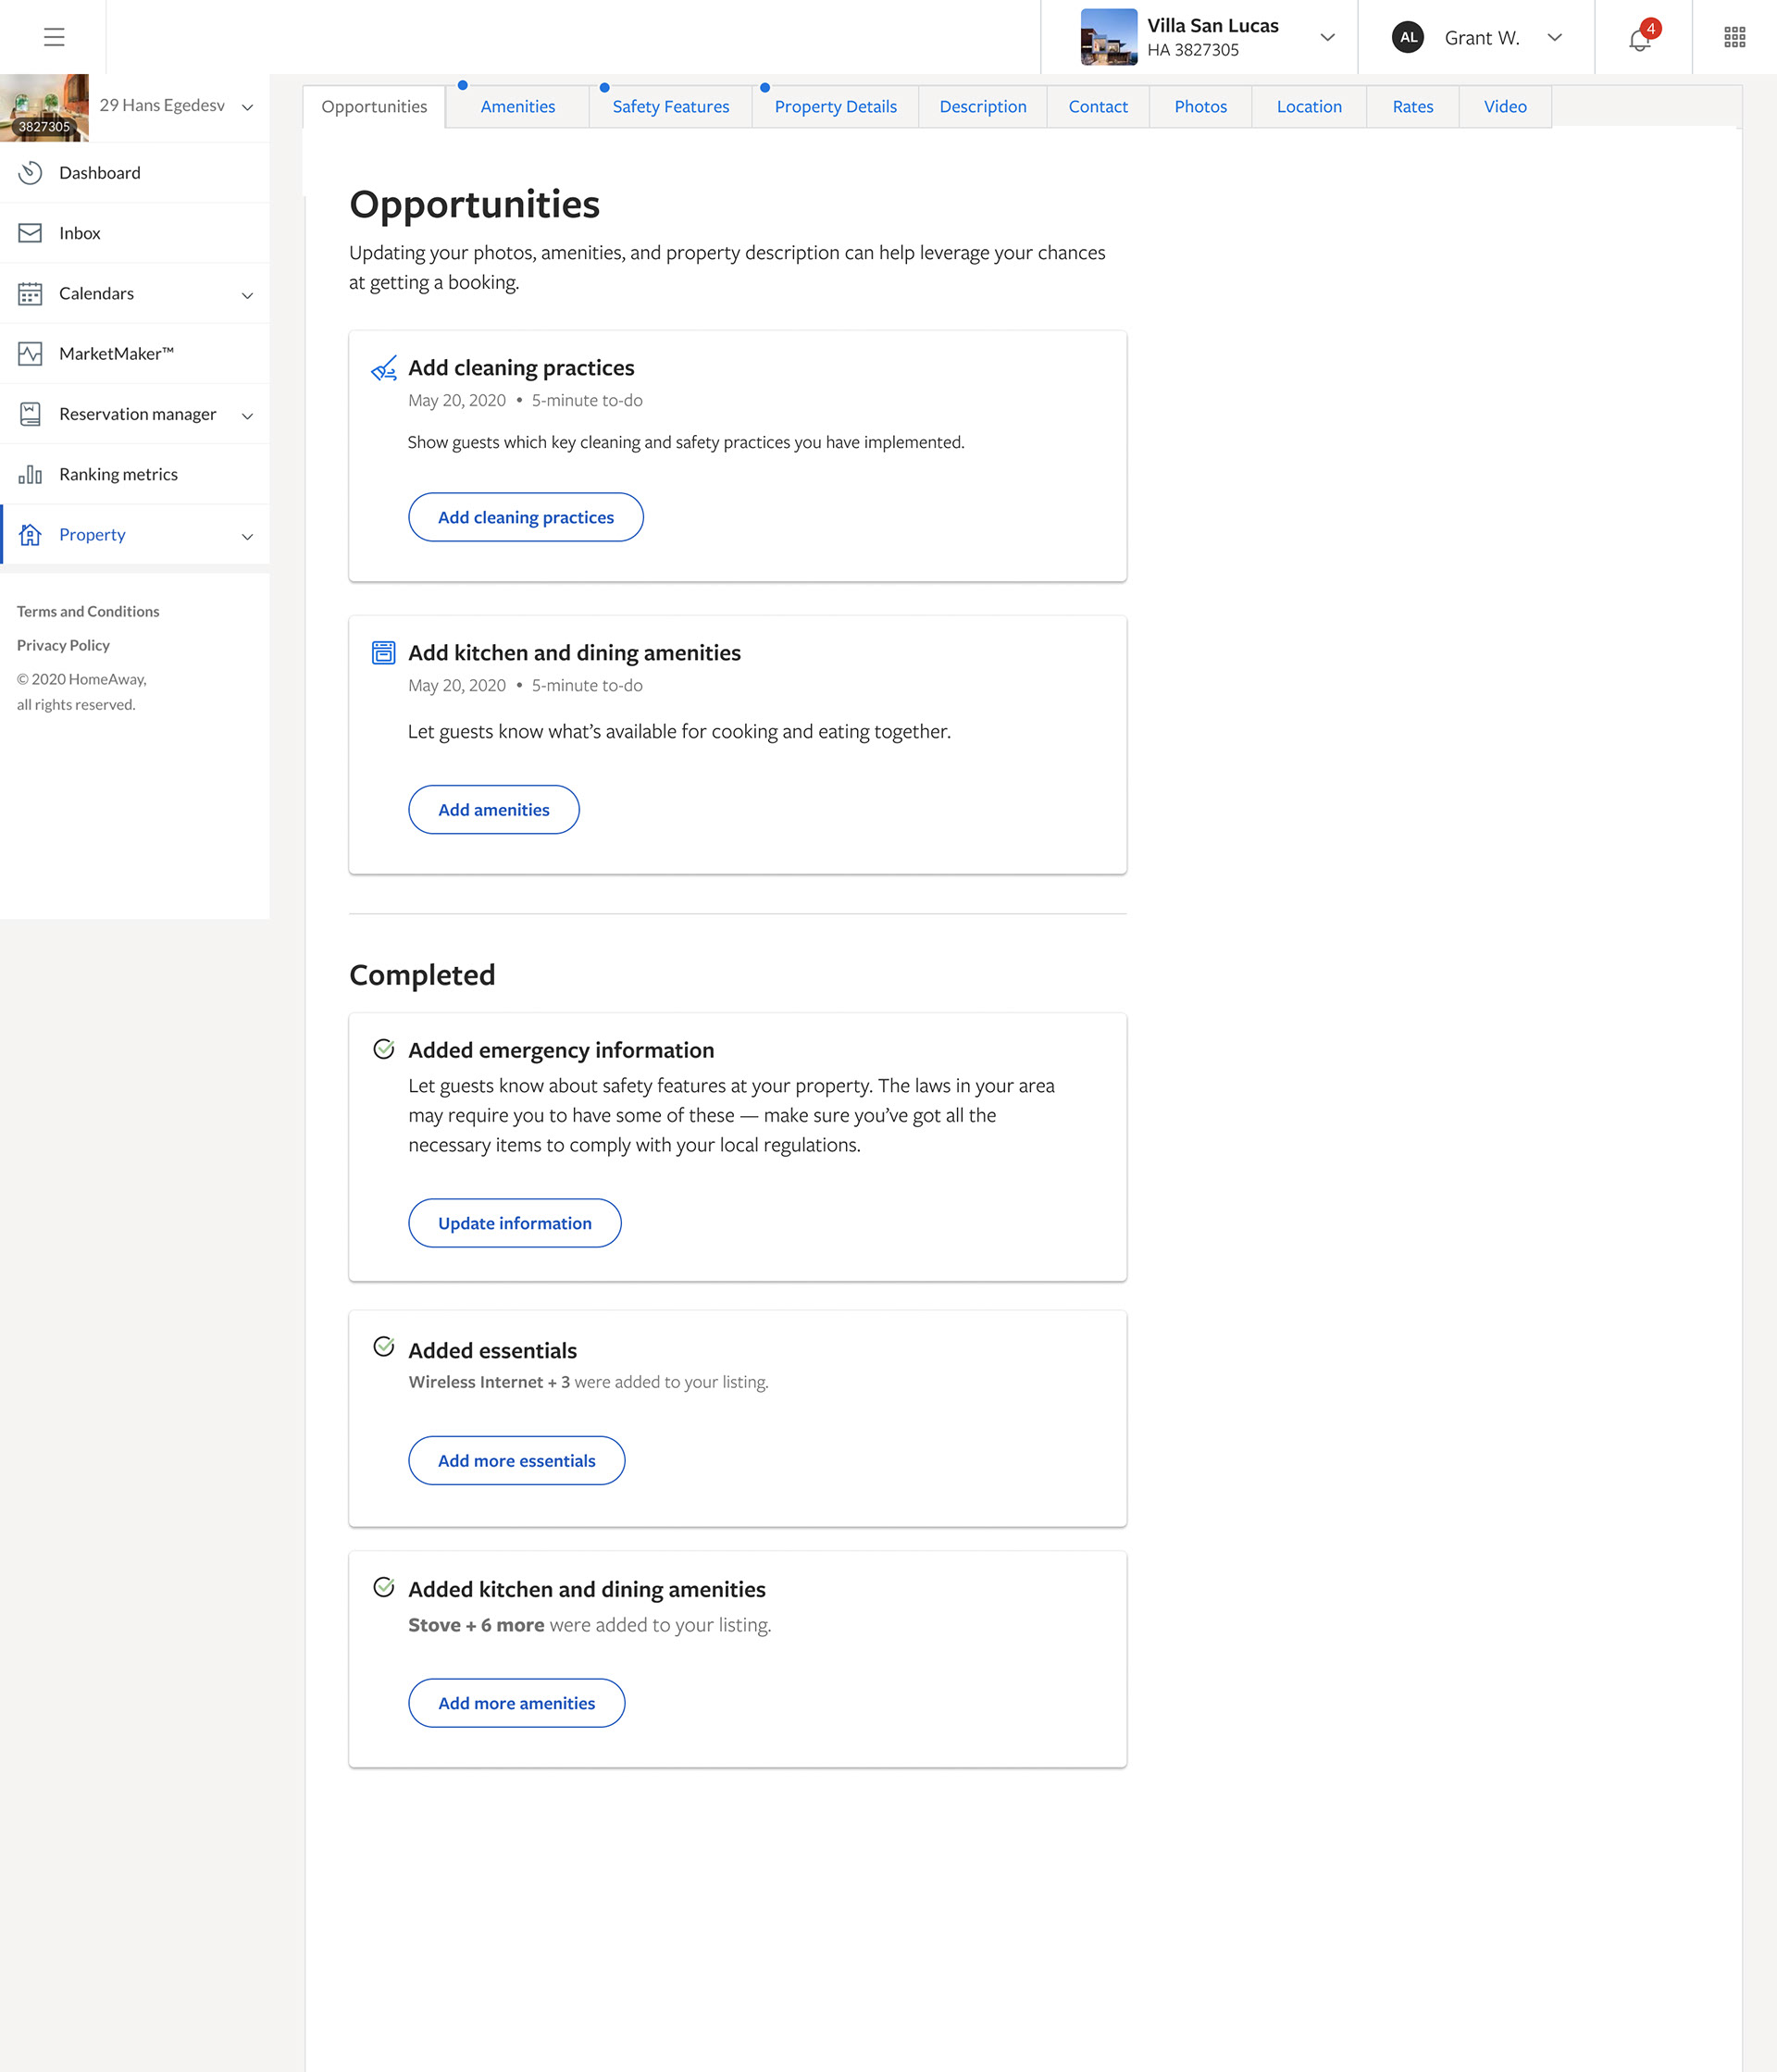
After Onboarding, property owners need a way to know that they should complete filling out more details about their listing, and receive information on new features because this will increase their chances of getting booked.
Coaching plays purpose:
• Help partner complete tasks to improve their listing more frequently
• Help guide partners towards learning the tool
• Create a 1 to 1 experience from Onboarding to the editor
My Process:
• Transferred coaching play content into designed cards for the Opportunity page
• Created several types of cards for AB testing
• Developed a seamless handoff for devs with the final designs
• Planned for future iterations and next steps for the current experience
Navigational coaching plays
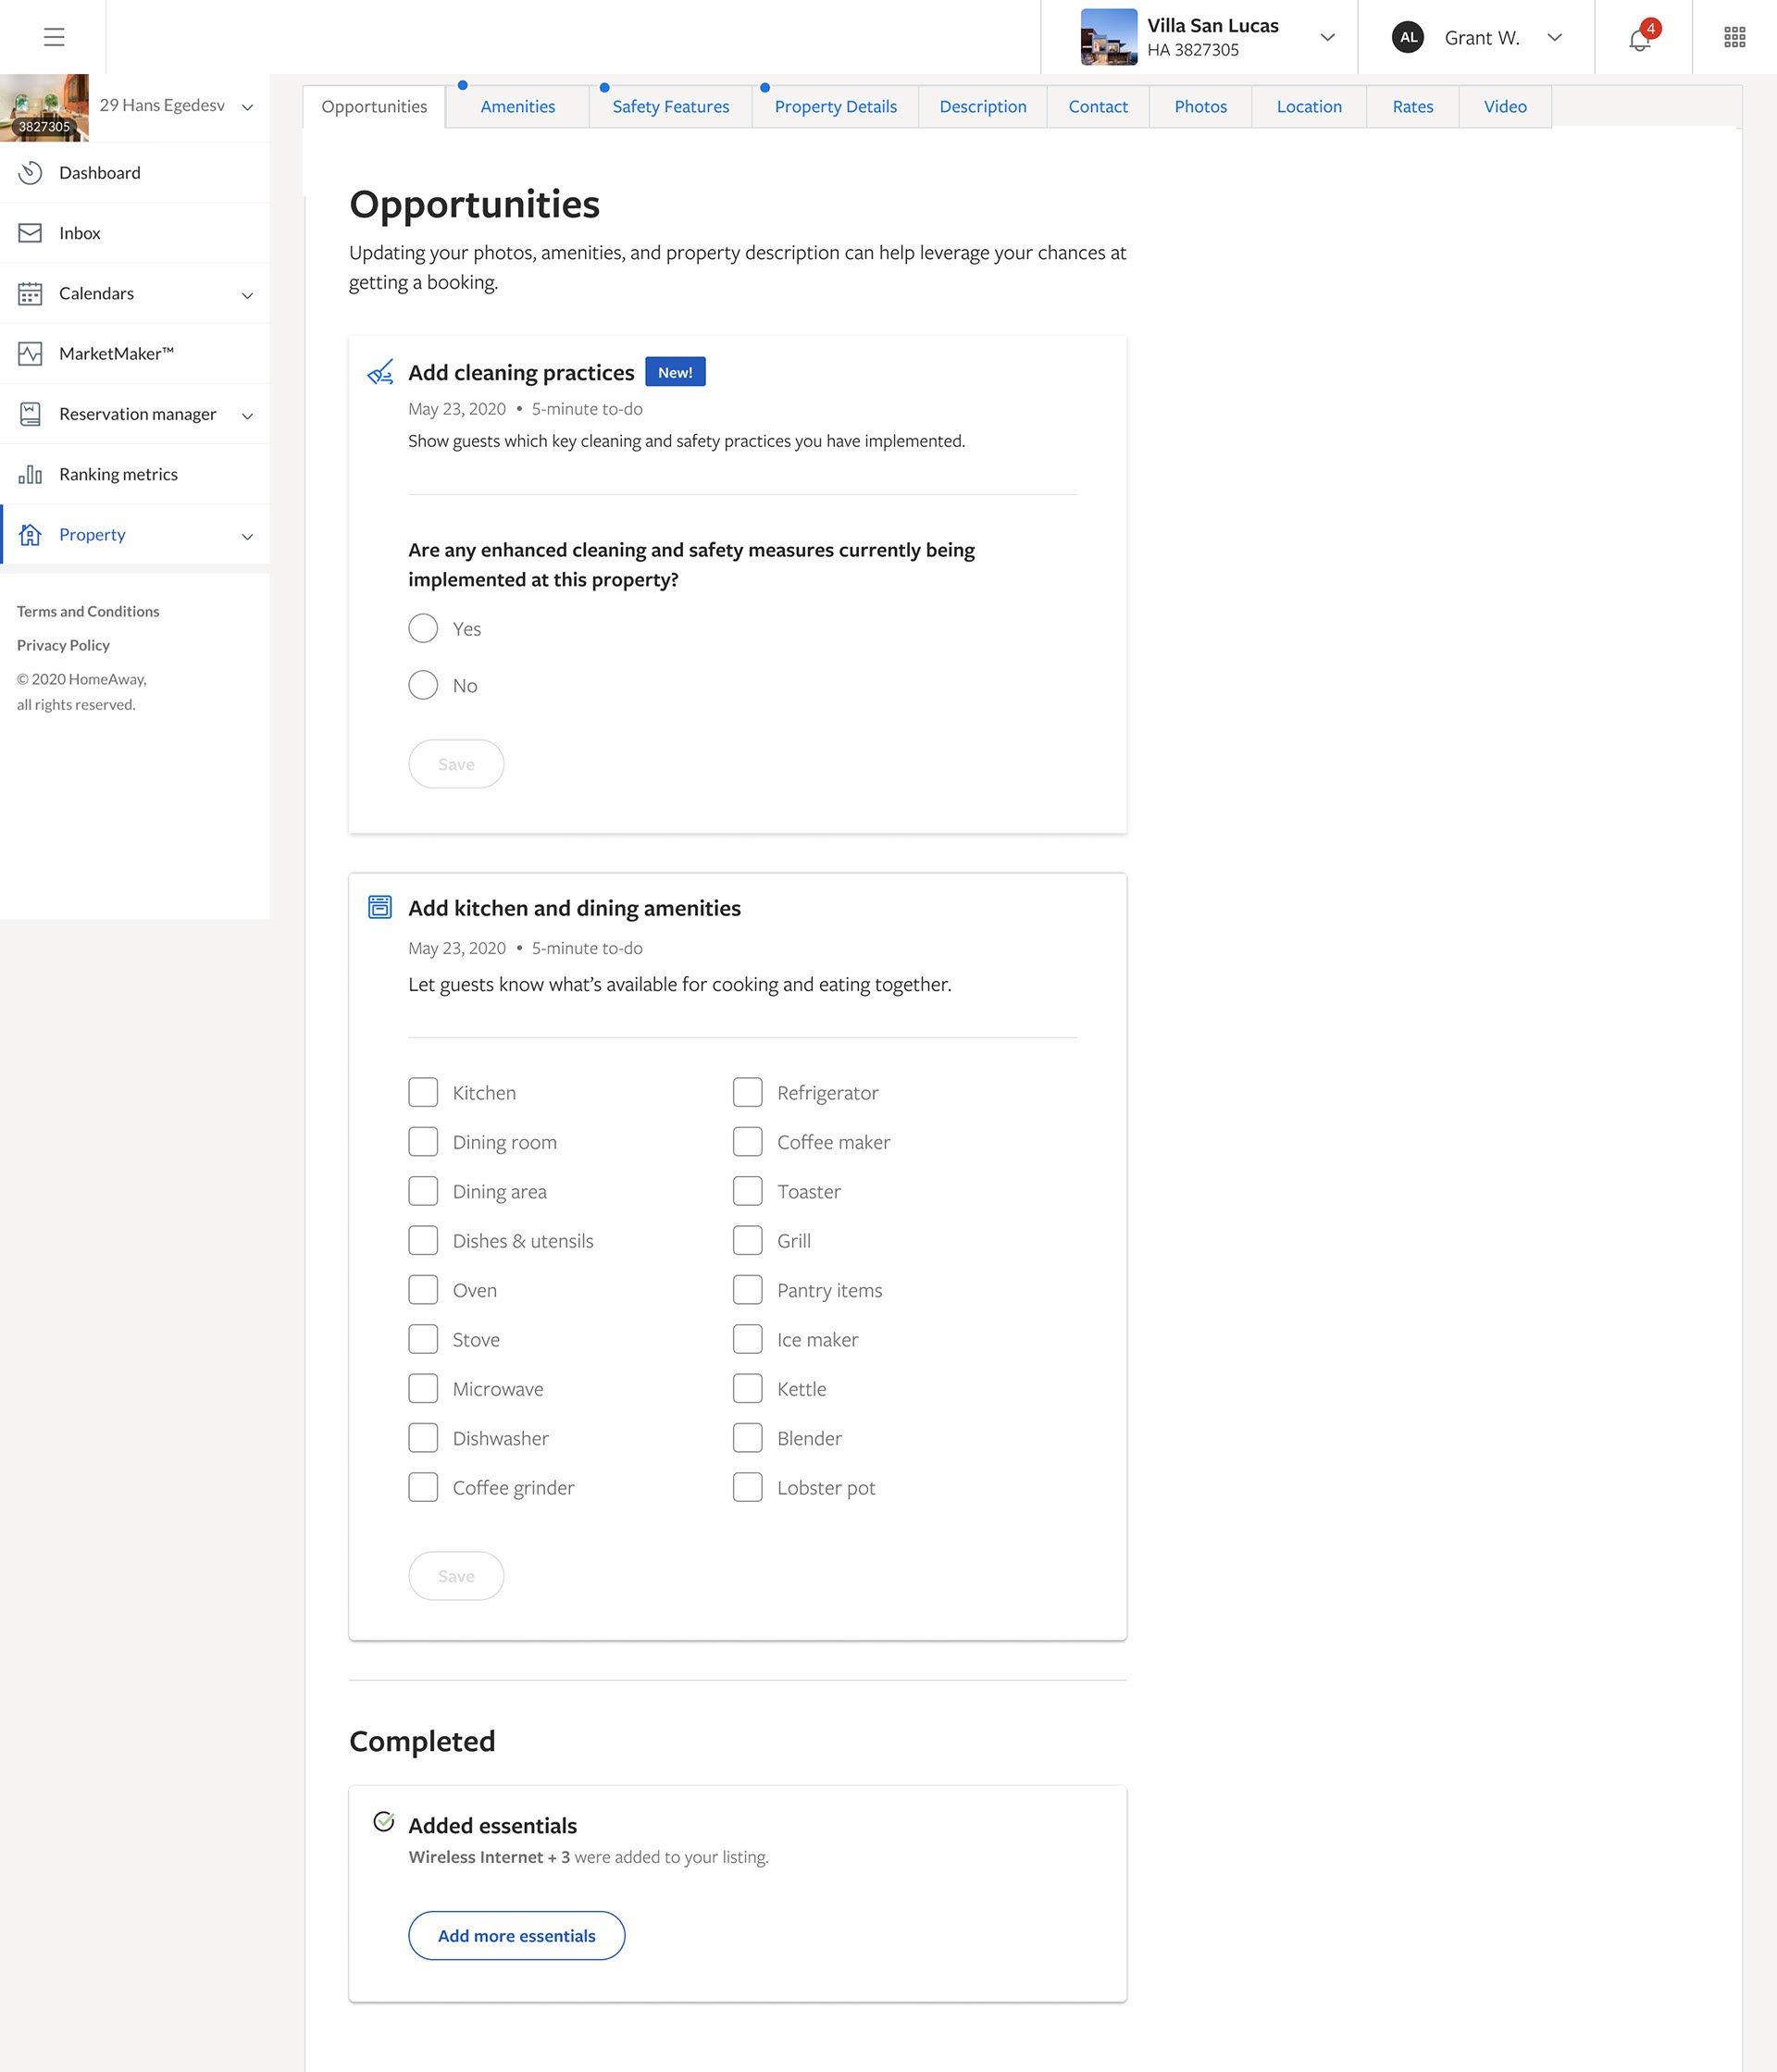
Expandable coaching plays
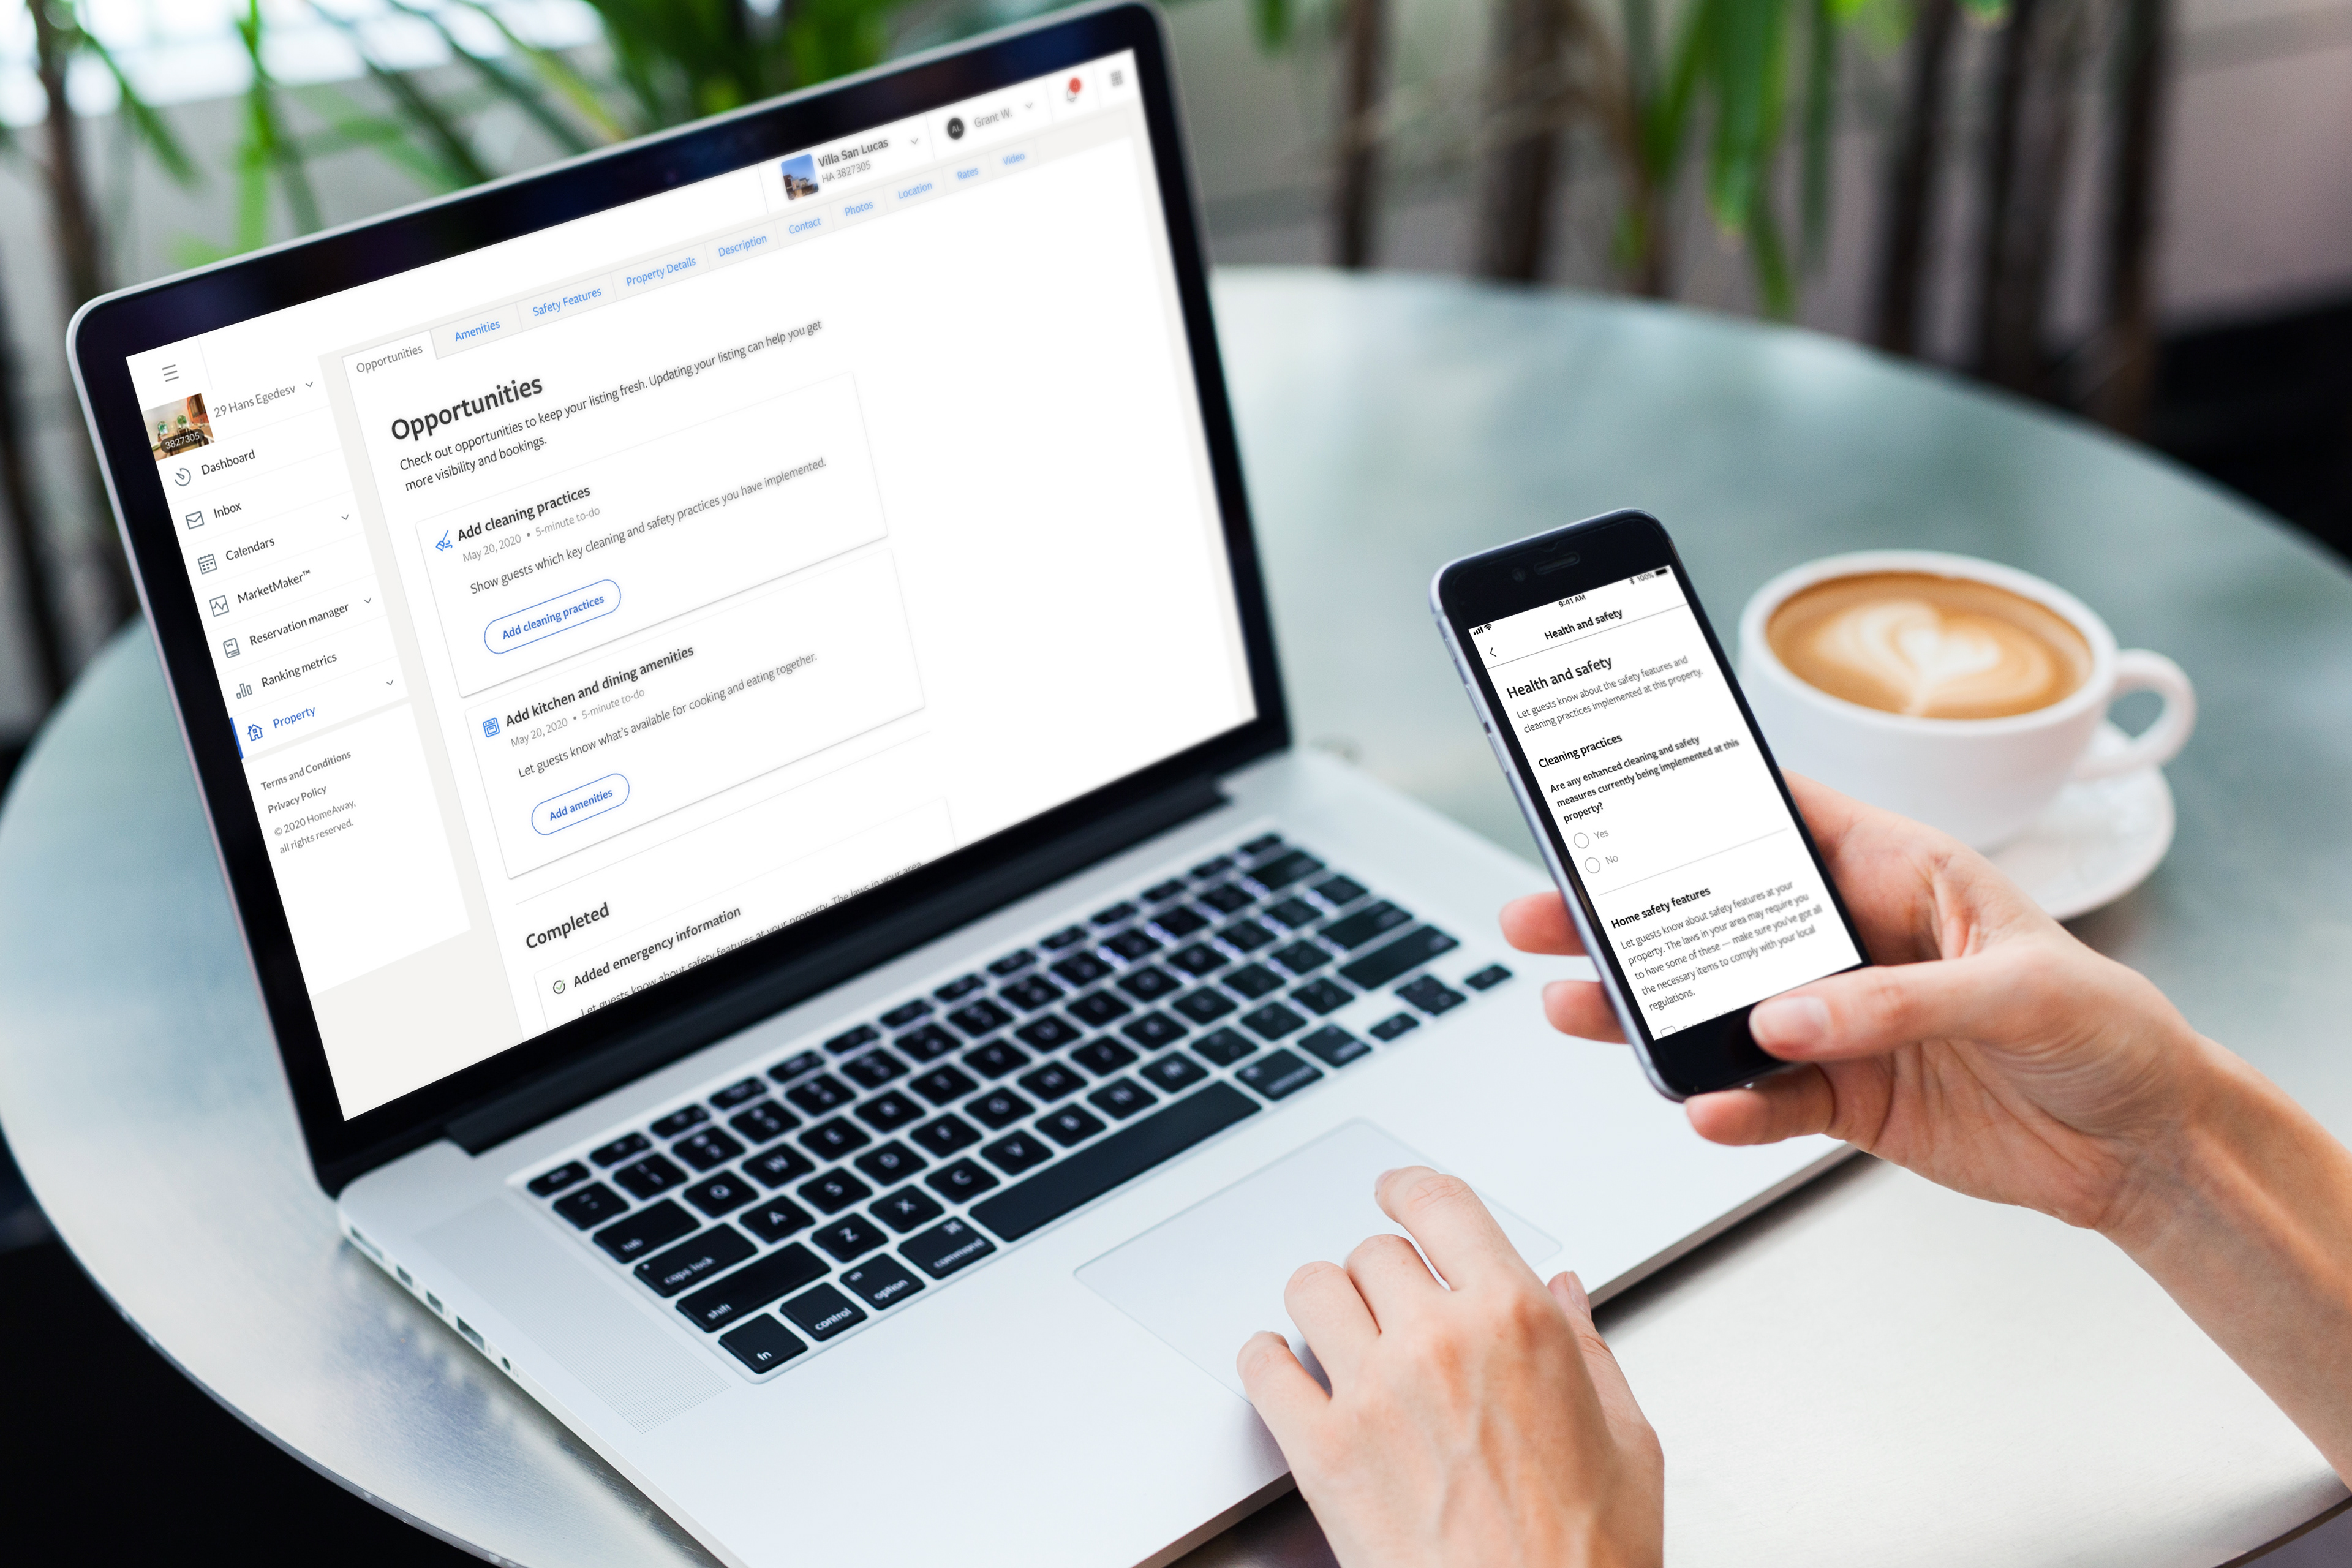
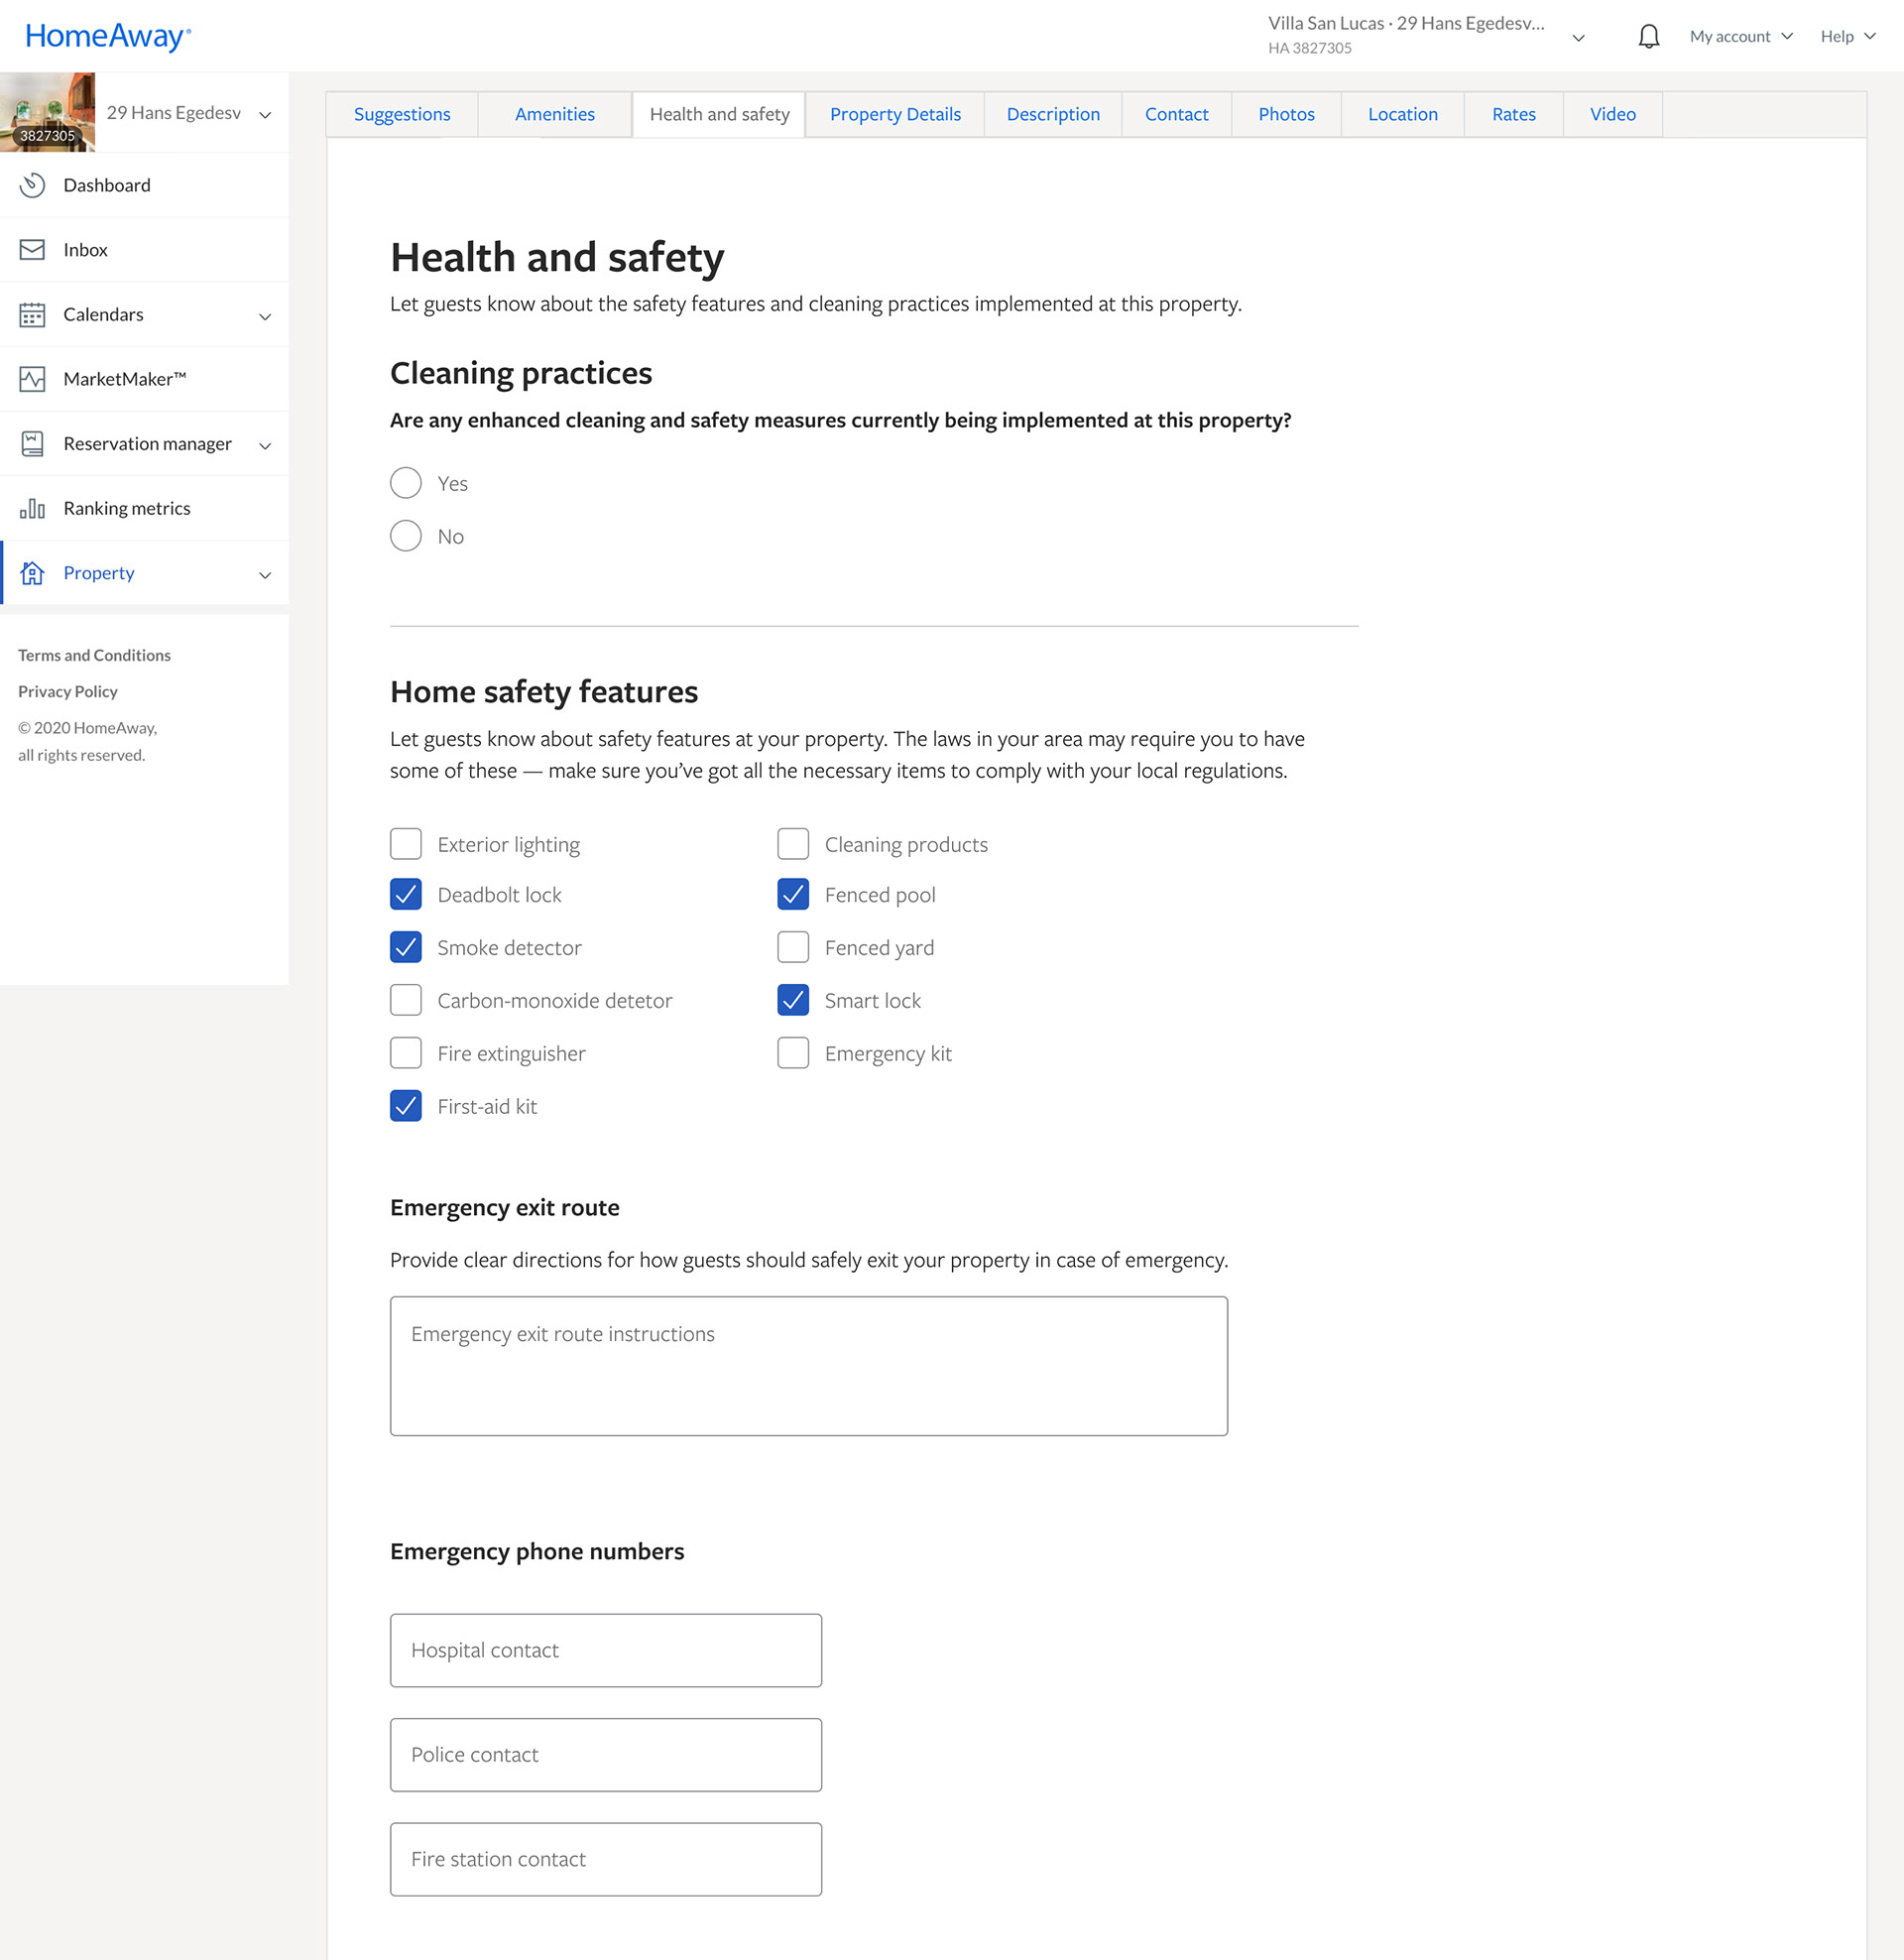
One of the most urgent updates to the property editor refresh was the cleanliness features that have been added for COVID-19 pandemic. I designed the page, and the coaching plays that would drive people to the page. The coaching play that I designed to drive people to this page to complete the cleanliness practices was successful overnight after release. On May 15, 2020 77% of partners going to Property Editor are updating their cleanliness info! Over 750 properties have updated the info in less than 24 hours.
A few days later 12,000 properties had adopted adding these features to their listing. This is a huge success for a page that doesn't get a lot of views.
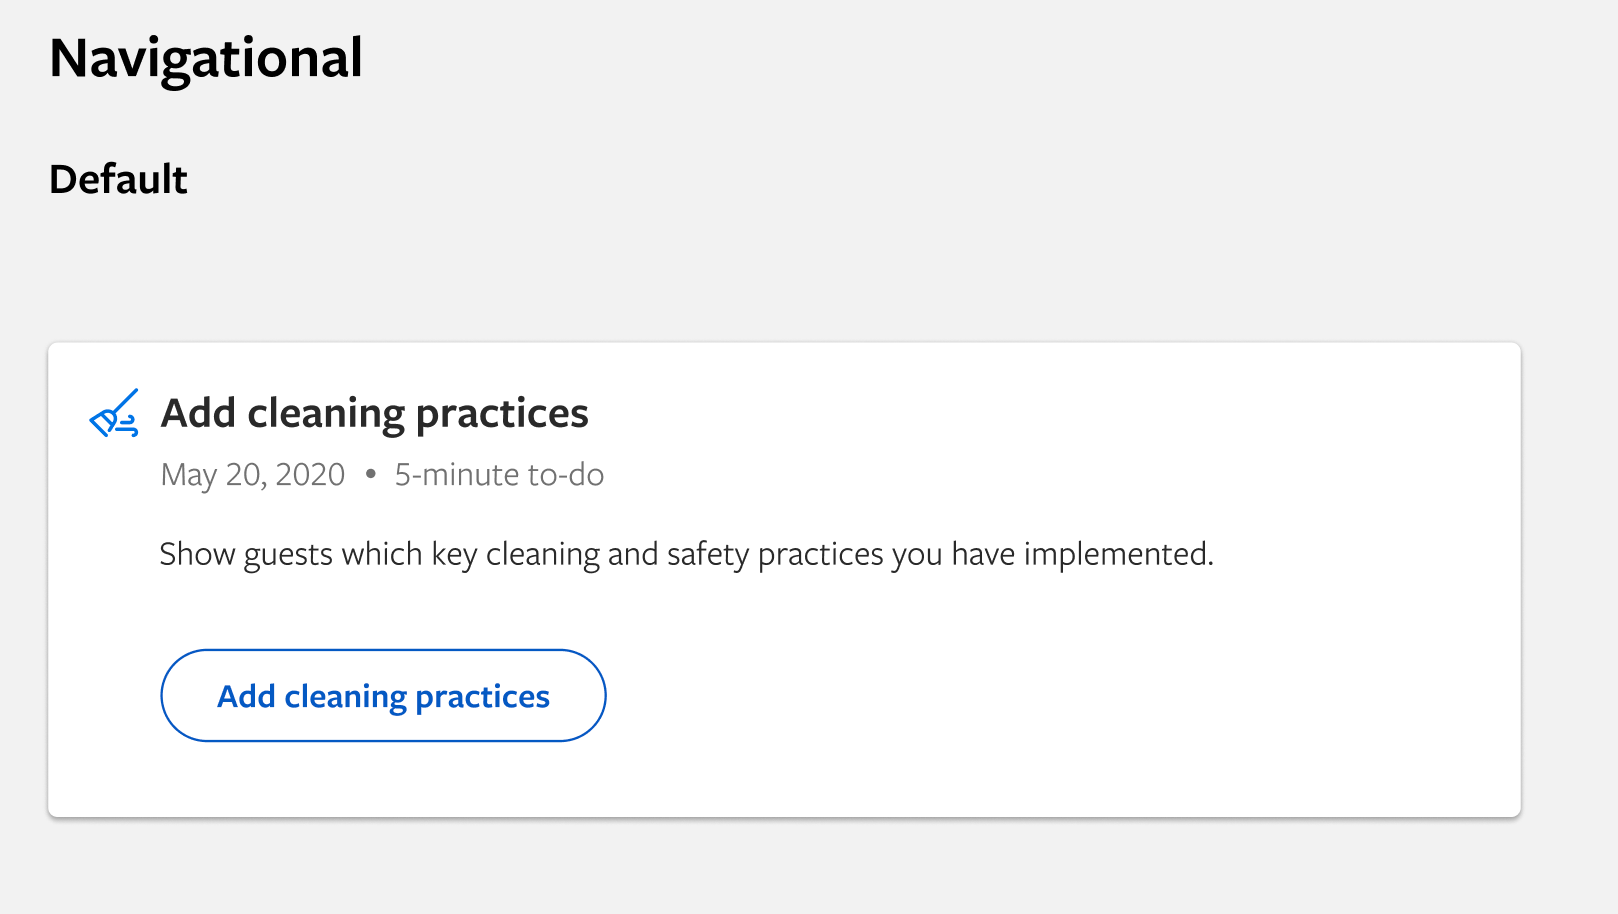
The image above is a close up of the coaching play which led to the Health and Safety tab, where they completed filling out the cleaning practices. The adoption of the cleaning practices was a huge success.
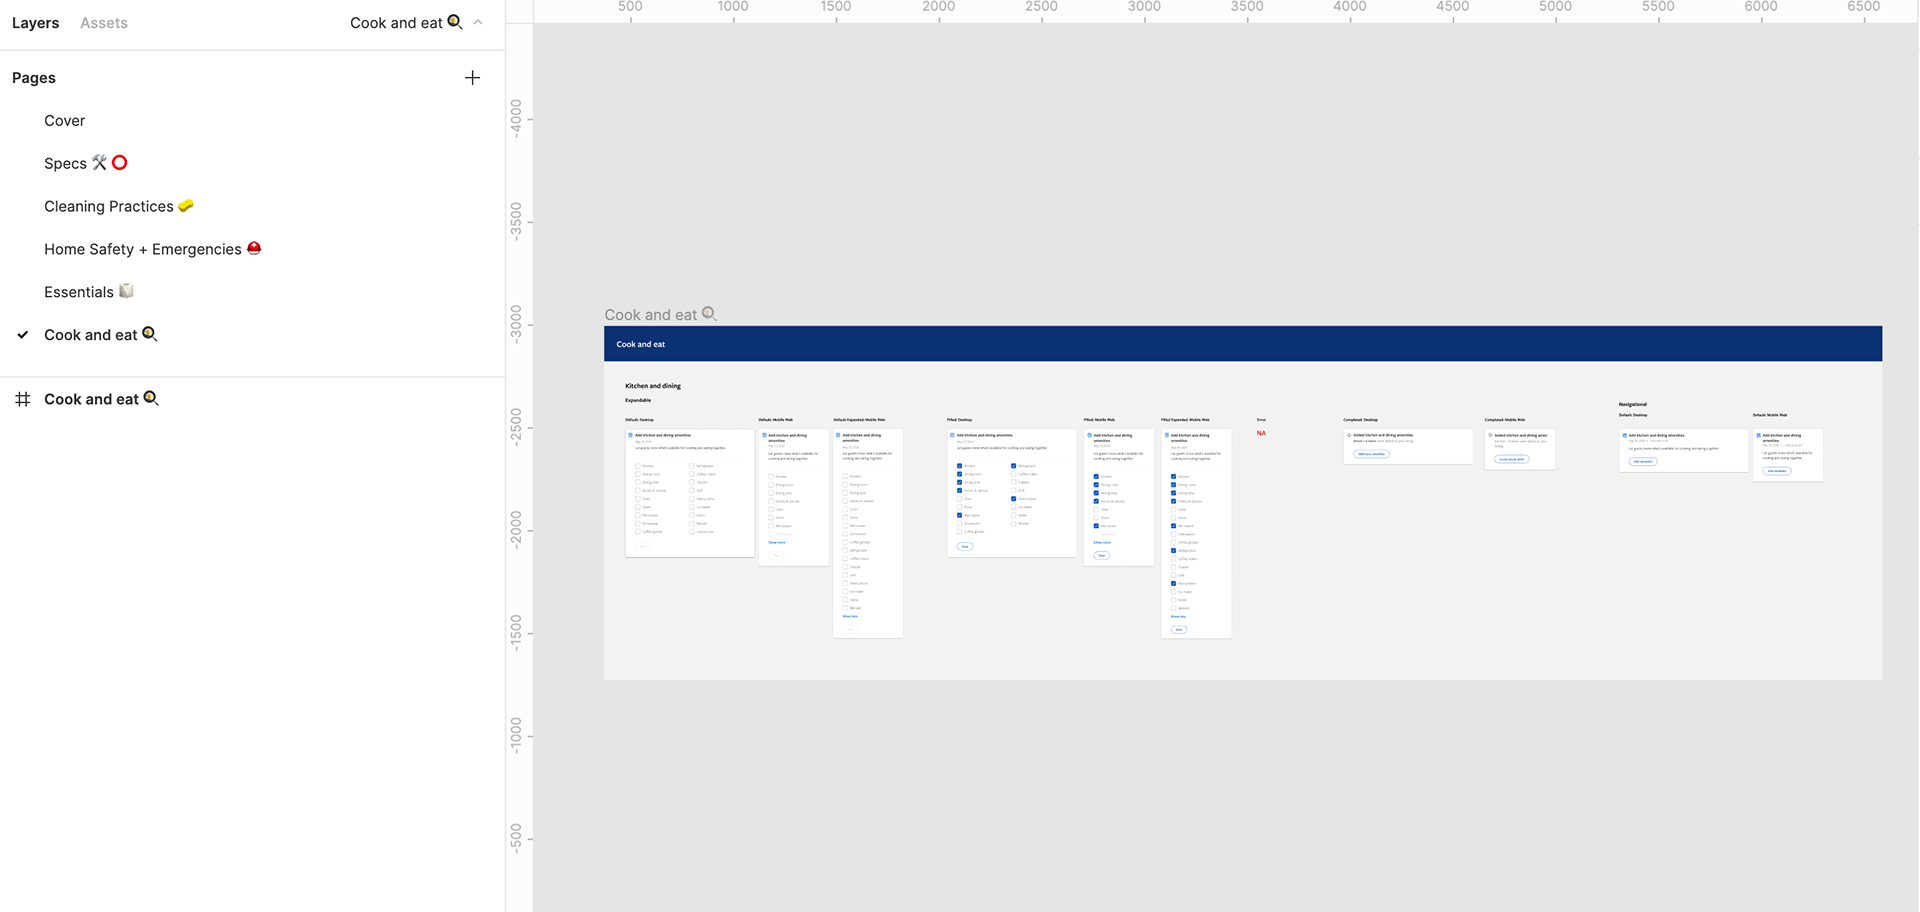
Developer Handoff
One thing I love about Figma is the Developers can easily see the specs of any component they click on. I tried it myself to make sure it was as easy as one click. Just make sure the Devs are on "View only" mode.
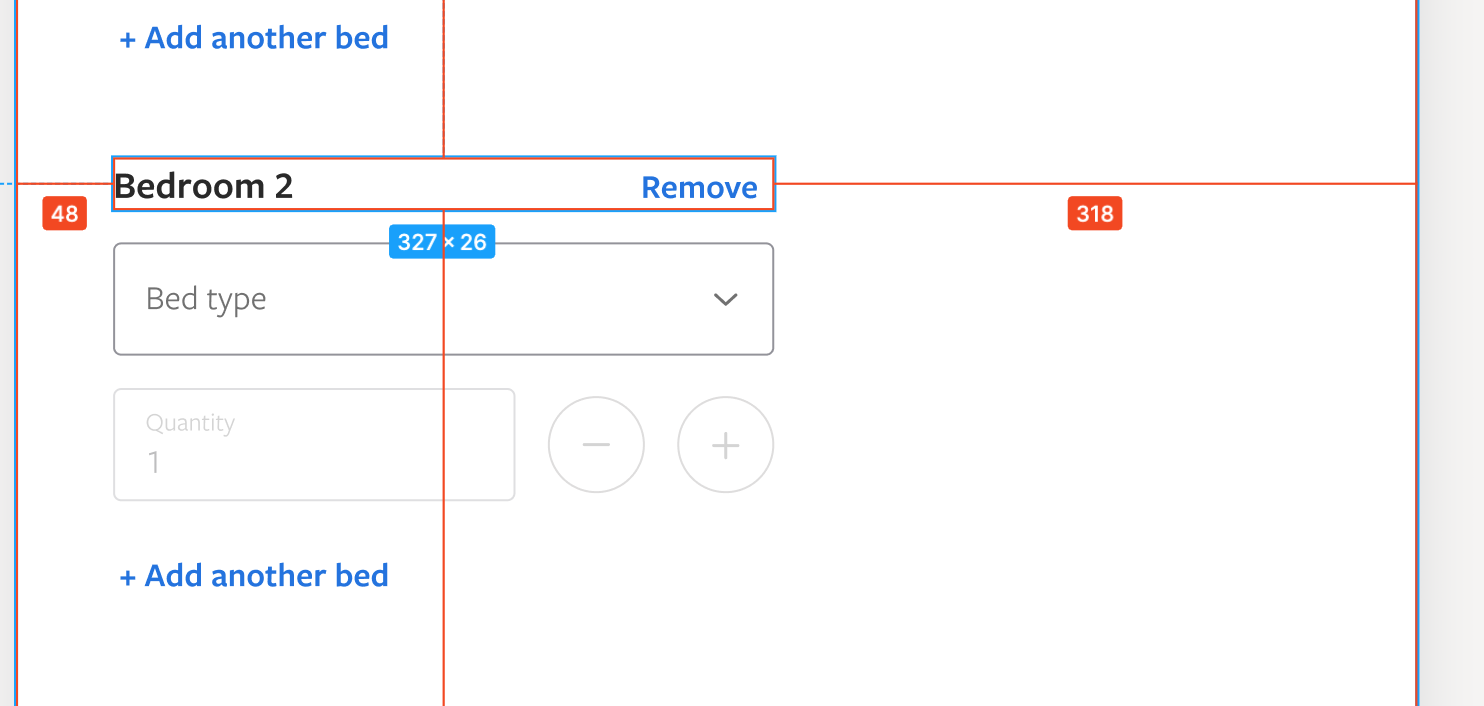
This is the Dev handoff for all of the coaching cards
What I did:
• Re arranged all of the pages to make sure it was easy to consume
• Worked 1 on 1 with the Onboarding team to make sure the stencil was aligned for handoff
• Created coaching plays for the Opportunity page